

Course catalog can be enabled on your site by turning on Paid Courses and Commerce features (from the Site Admin->Site Details->Features tab). Read more about monetization here
Catalog Settings :
A setting option is available in catalog page to enable/disable various catalog related settings.
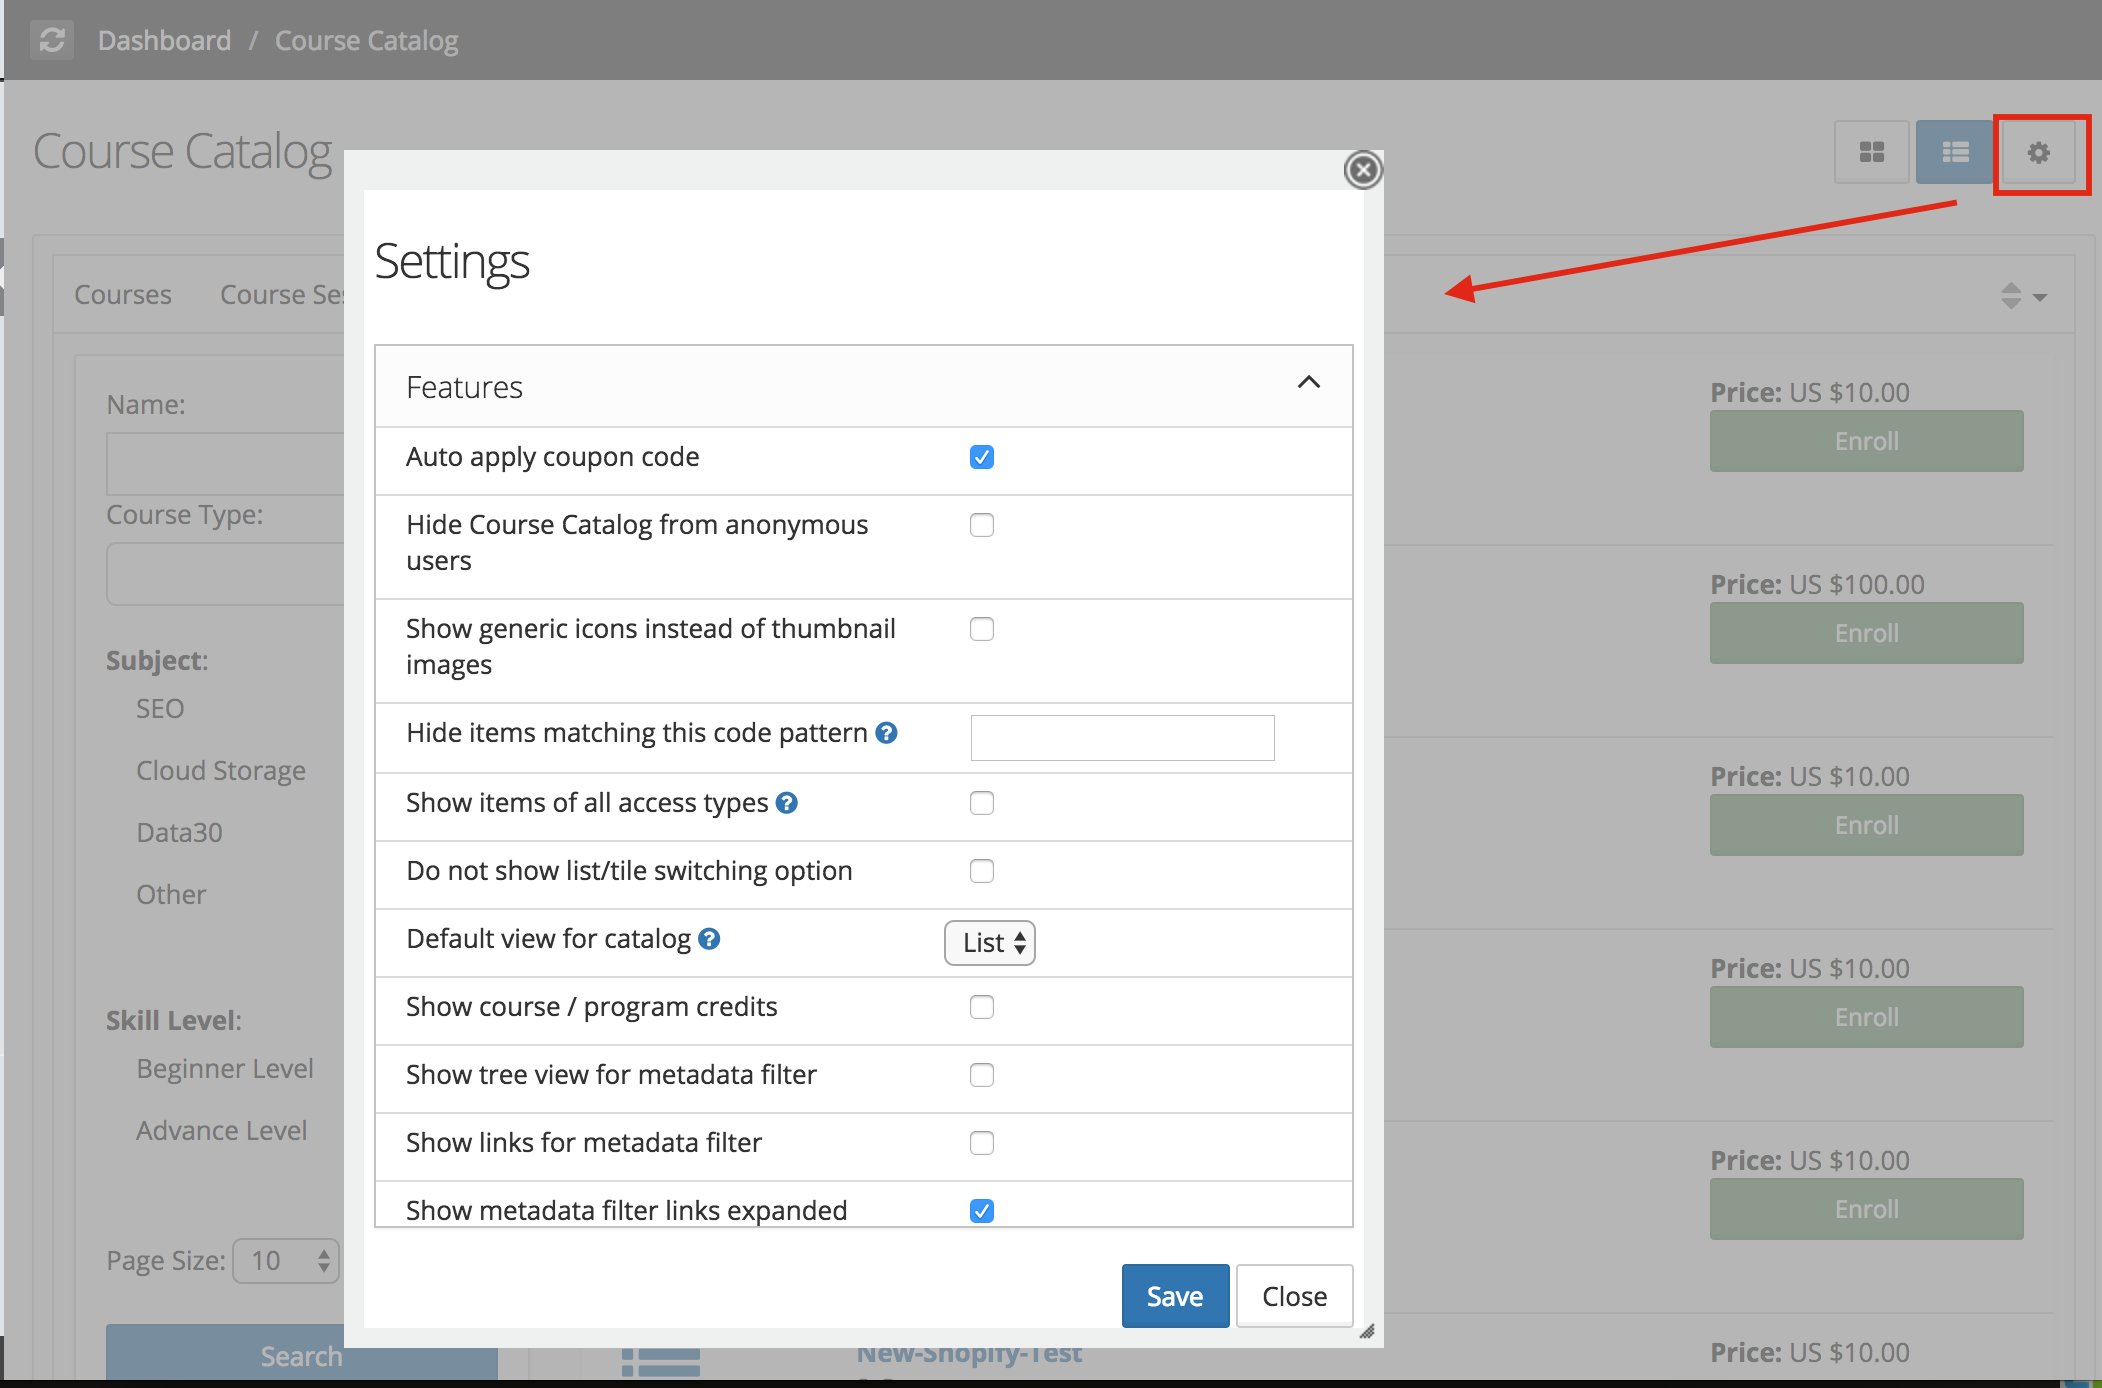
Auto Apply Coupon - If settings auto apply coupon is enabled, A group linked coupon gets applied automatically and when a user access the catalog if there is a free access coupon set for user's group, user will see 'Enroll' option in place of 'Buy' button and user can enroll in course/program without making payment or entering coupon code.
Catalog visibility - By default catalog is visible to all visitors, signed-in users as well as anonymous users. Catalog visibility can be restricted only for signed-in user by enabling setting 'Hide Course Catalog from anonymous users'.
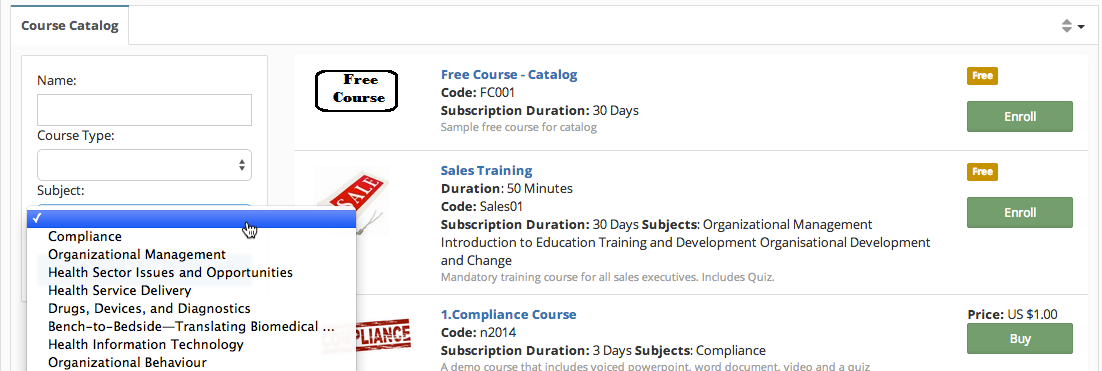
Catalog items - Catalog list includes three types of items - course sessions (single course), program sessions (multiple courses bundle) and events associated with course sessions. For placing a item in catalog list, It's access type should be 'paid'. To offer a free items on catalog, set access type as paid and item price as zero.
Catalog items visibility
- Default behavior - All items ( course sessions/program sessions/events) having access type as paid appears on the catalog, These items can be associated with any group. When a user enrolls in a item, user gets added in item's associated group.
- Custom Setting to show item having other access type - Catalog setting 'Show items of all access types' can be enabled to show items having access type as open/open-Group Admin approval/Open- Instructors approval in catalog along with paid items. Open items will appear only for group members while paid items appears for everyone.
- Restricting Catalog paid items visibility - Refer to Paid Items visibility in catalog for group members only in which group that item is created.
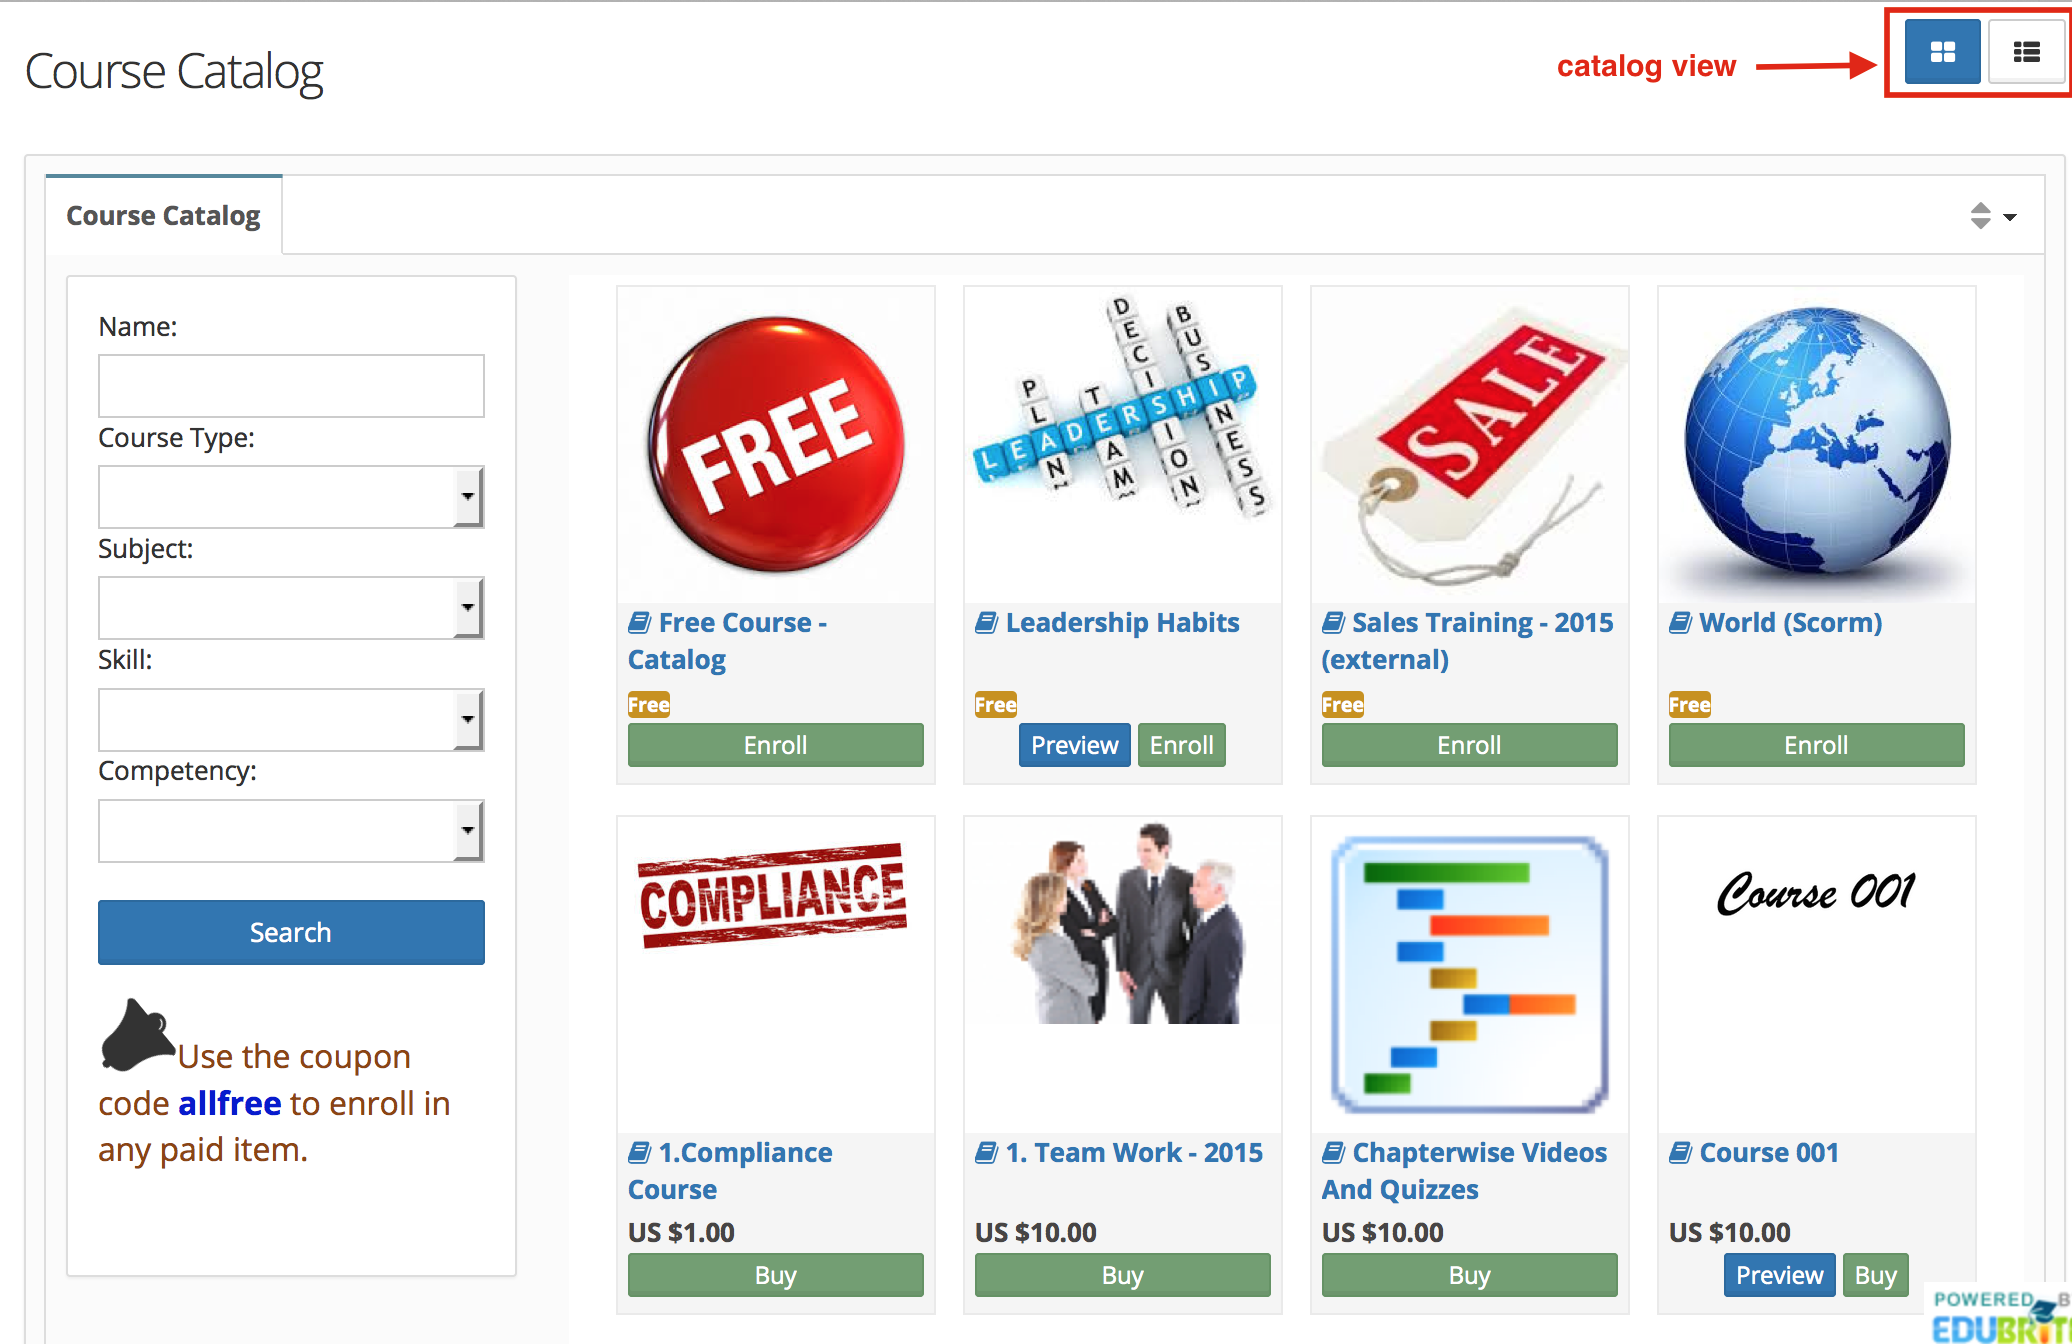
Catalog View -
catalog page provides two views - Tile view and List page. Using catalog settings admin can set default catalog view style using setting 'Default view for catalog' and can remove view switching option using setting 'Do not show list/tile switching option'.
Catalog Tile View
Catalog List View
The list page provides a small logo and description about the paid entry (course session or program session).
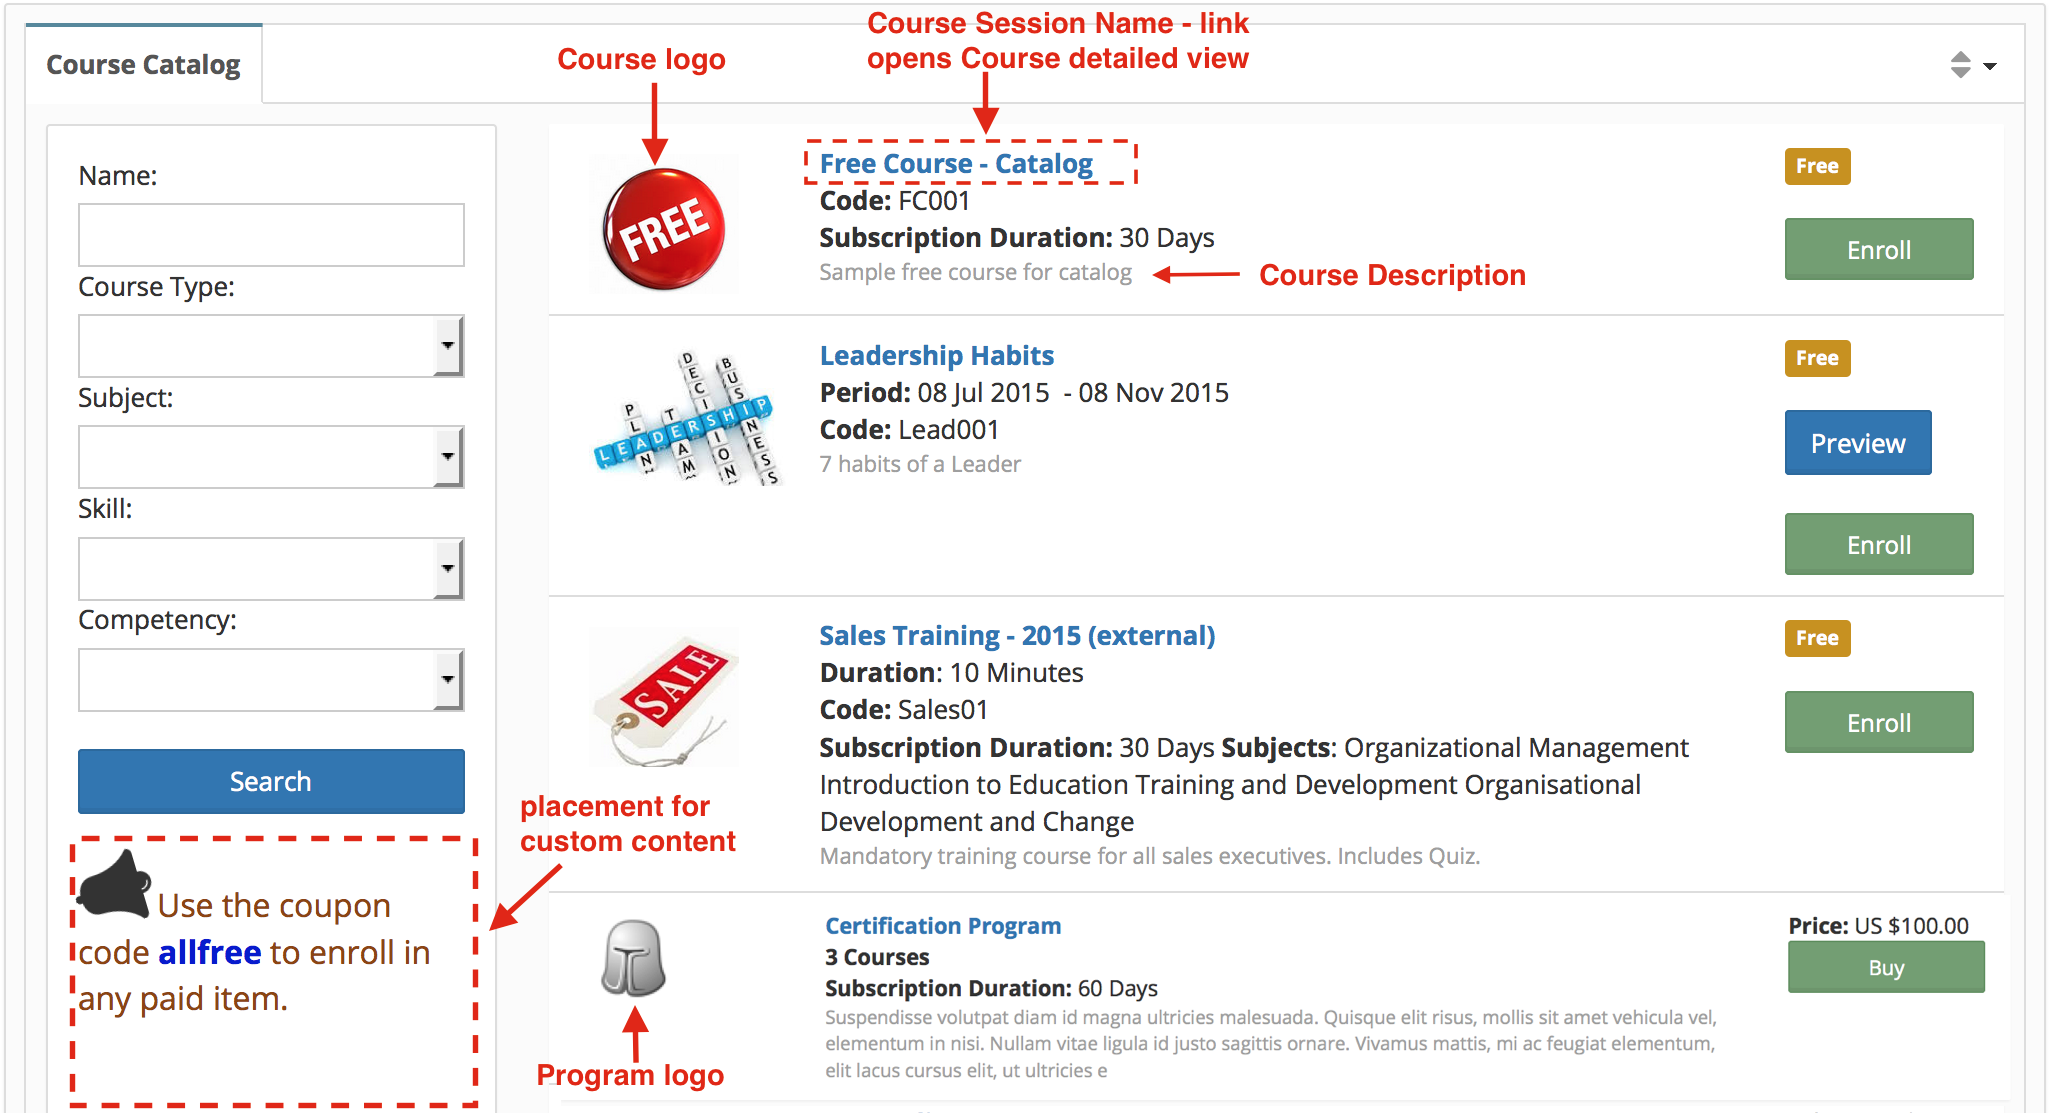
Logo: Logo for course session or program session can be added using small banner or adding logo image in course/program.
Course logo -
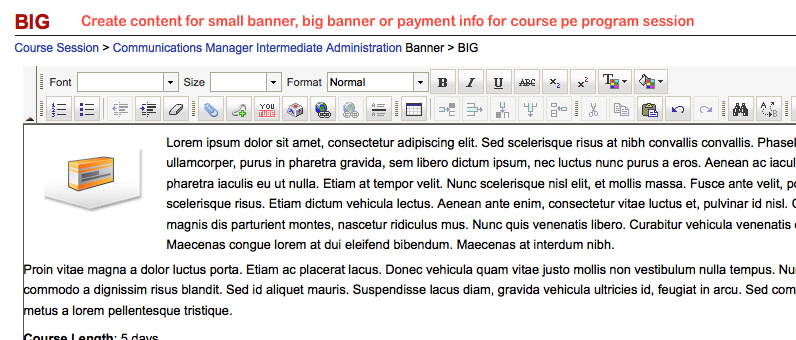
Placement content can be added at course level itself. If no content was added already a green + icon will be shown, once you add the content, a red X icon will be shown which can be used to delete the banner.
Course placements -

Placement content added at course level can be over written at course session level. To add/update any placement open the course session details or program session details.
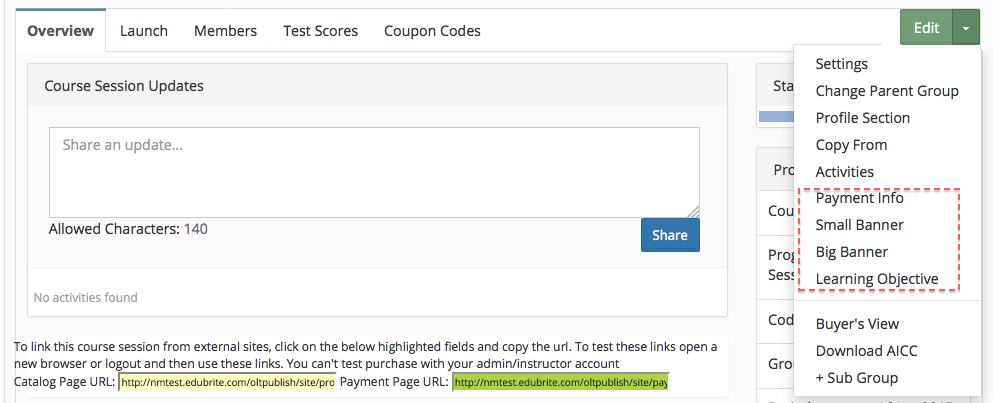
Preview Button: Preview button will show up if the course is a site level course (not private) or it is private but its preview-able property has been enabled in the course editor (from authorization tab). In preview mode, user will be able to view lessons and take tests which have been made previewable (accessible to non enrolled users) in course editor. Non previewable items will be visible in course outline but will appear as locked.
Buy Button: Clicking on Buy will take the user directly to the purchase page from where they can enter coupon code (if applicable) or make a payment using card (for MerchantWarrior and Authorize.net) or proceed to Paypal/CCAvenue depending on the payment method configured.
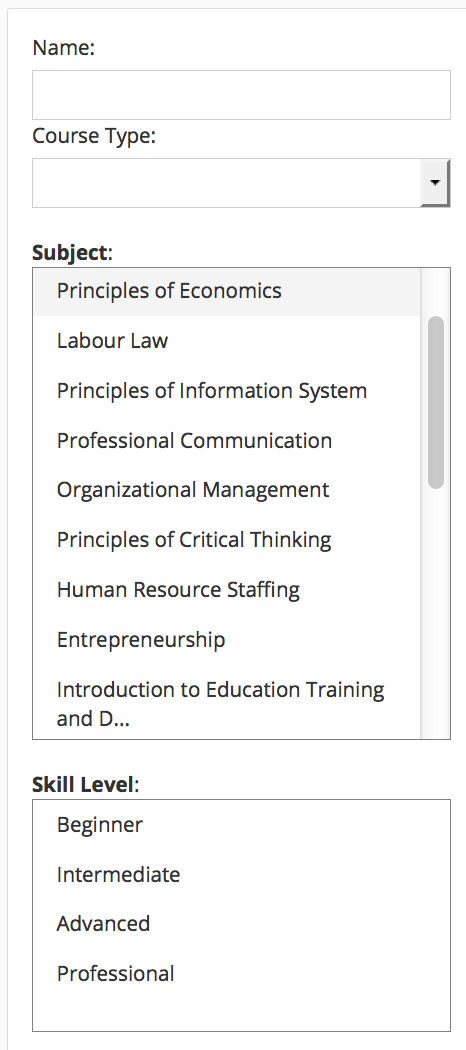
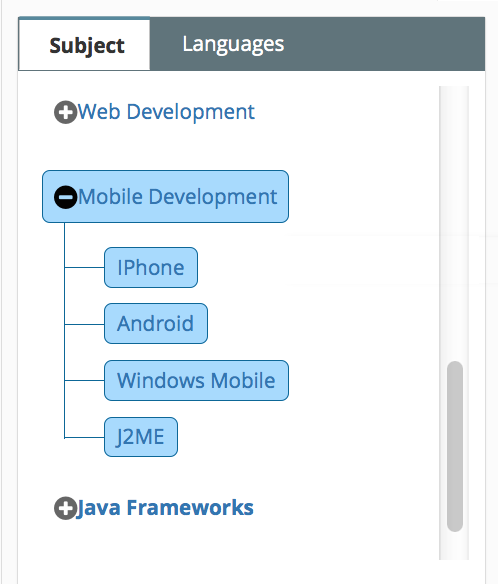
Metadata based Filtering: You can setup metadata definition in the site, and then tag each course with specific subjects. The catalog page provides metadata based filtering, upto 3 levels of subjects. The drop down shows top level subjects first. Once you select a subject the list gets filtered and a second level dropdown would appear below first one with 2nd level subject entries corresponding to the selected first level.
Metadata filter views:
There are setting to change metadata filters view, by default filters are presented as dropdown.
- Default view - dropdown
- Link View - can be enabled using catalog setting 'Show links for metadata filter' shows metadata values as list and second level child will appear on clicking first level value.
- Link Expanded View (can be enabled using catalog setting 'Show metadata filter links expanded') -shows metadata values in expanded structure.
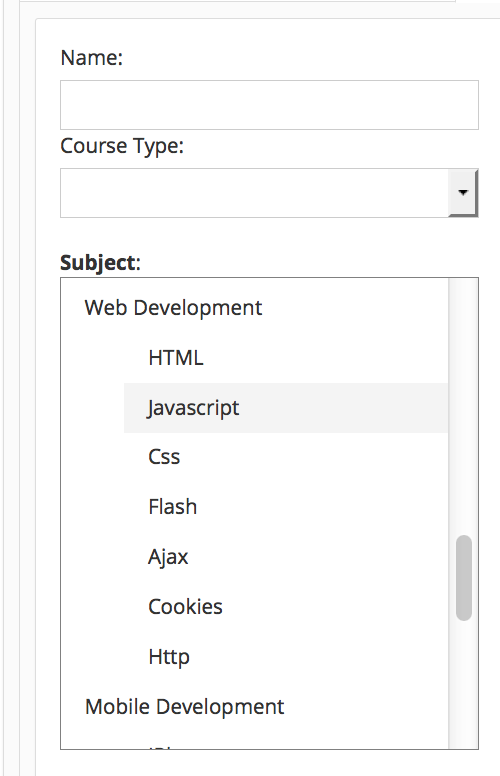
- Tree View (can be enabled using catalog setting 'Show tree view for metadata filter') - shows subject and language in tree view.
Course Type Filter :
Course type filter provided filtering catalog items on item type - Online single item (i.e. course session ), On Demand multiple course ( i.e. program sessions) and Online events.
If this filter is not needed using css customization it can be removed from the list. To hide Course Type filter access Site Admin -> Placements -> V2 CSS and add below custom code. save and publish.
|
/* Hide Course Type Filter */ #cat_course_type_filter {display: none} |
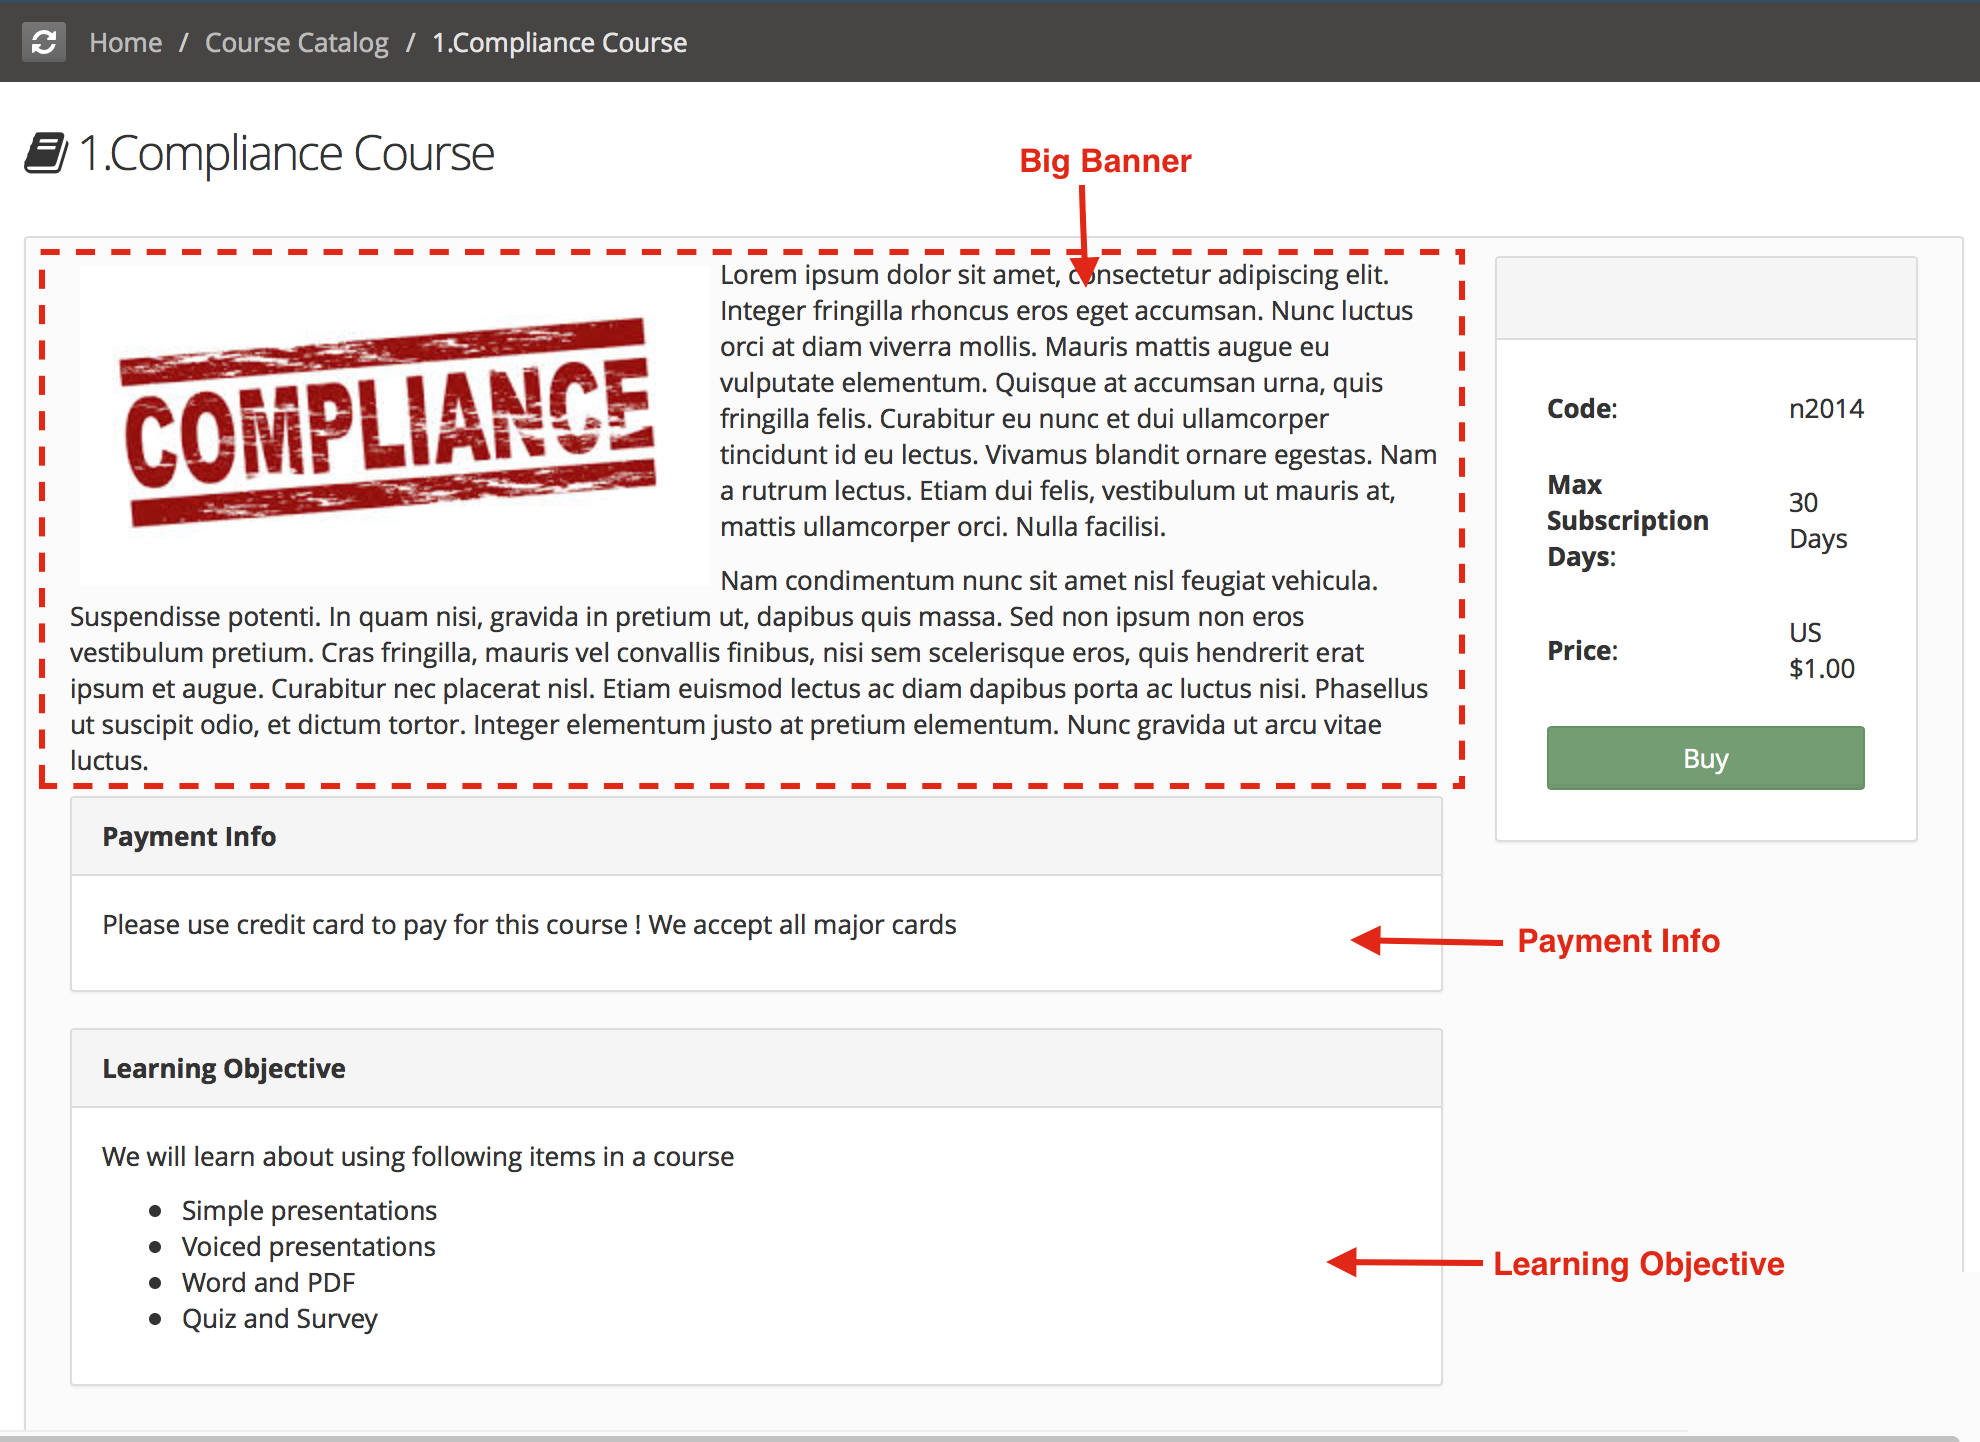
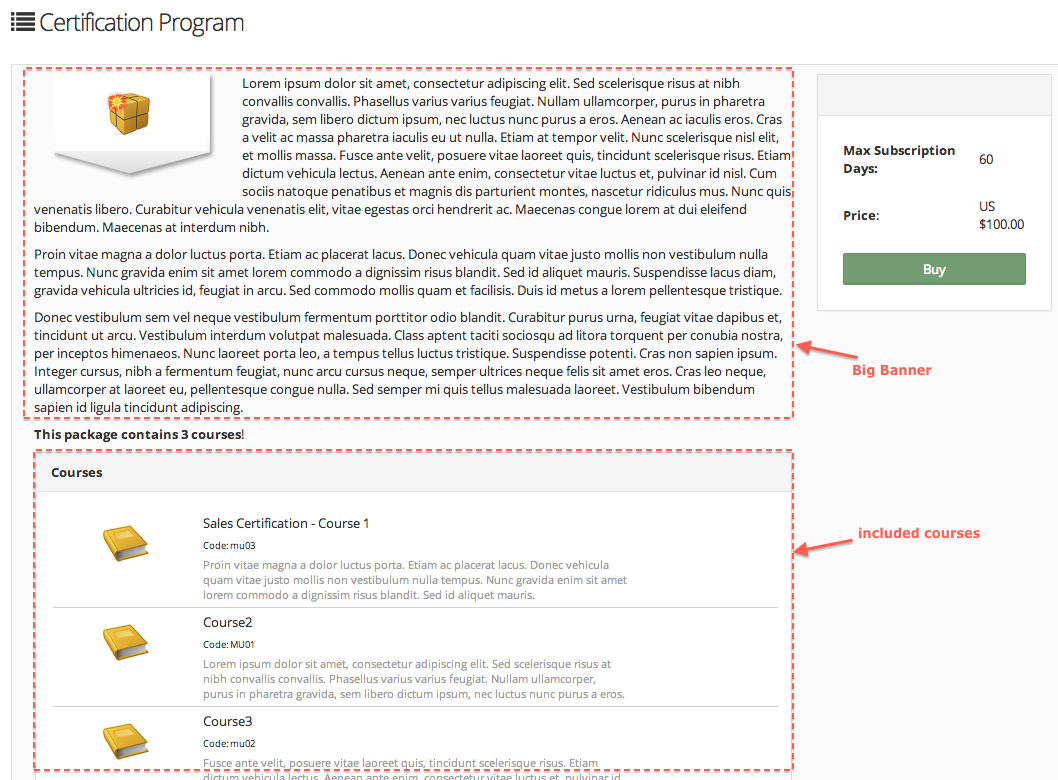
Detail Page
When user clicks on the catalog entry, they are taken to a detail page where they can see more information about the entry. For each course session or program session, you have Big Banner placements,Payment Info and learning Objective. which can be used to add any content you like to show. The editor will allow you to use rich text formatting, colors, images and links.
Course Session Details
Program Session Details
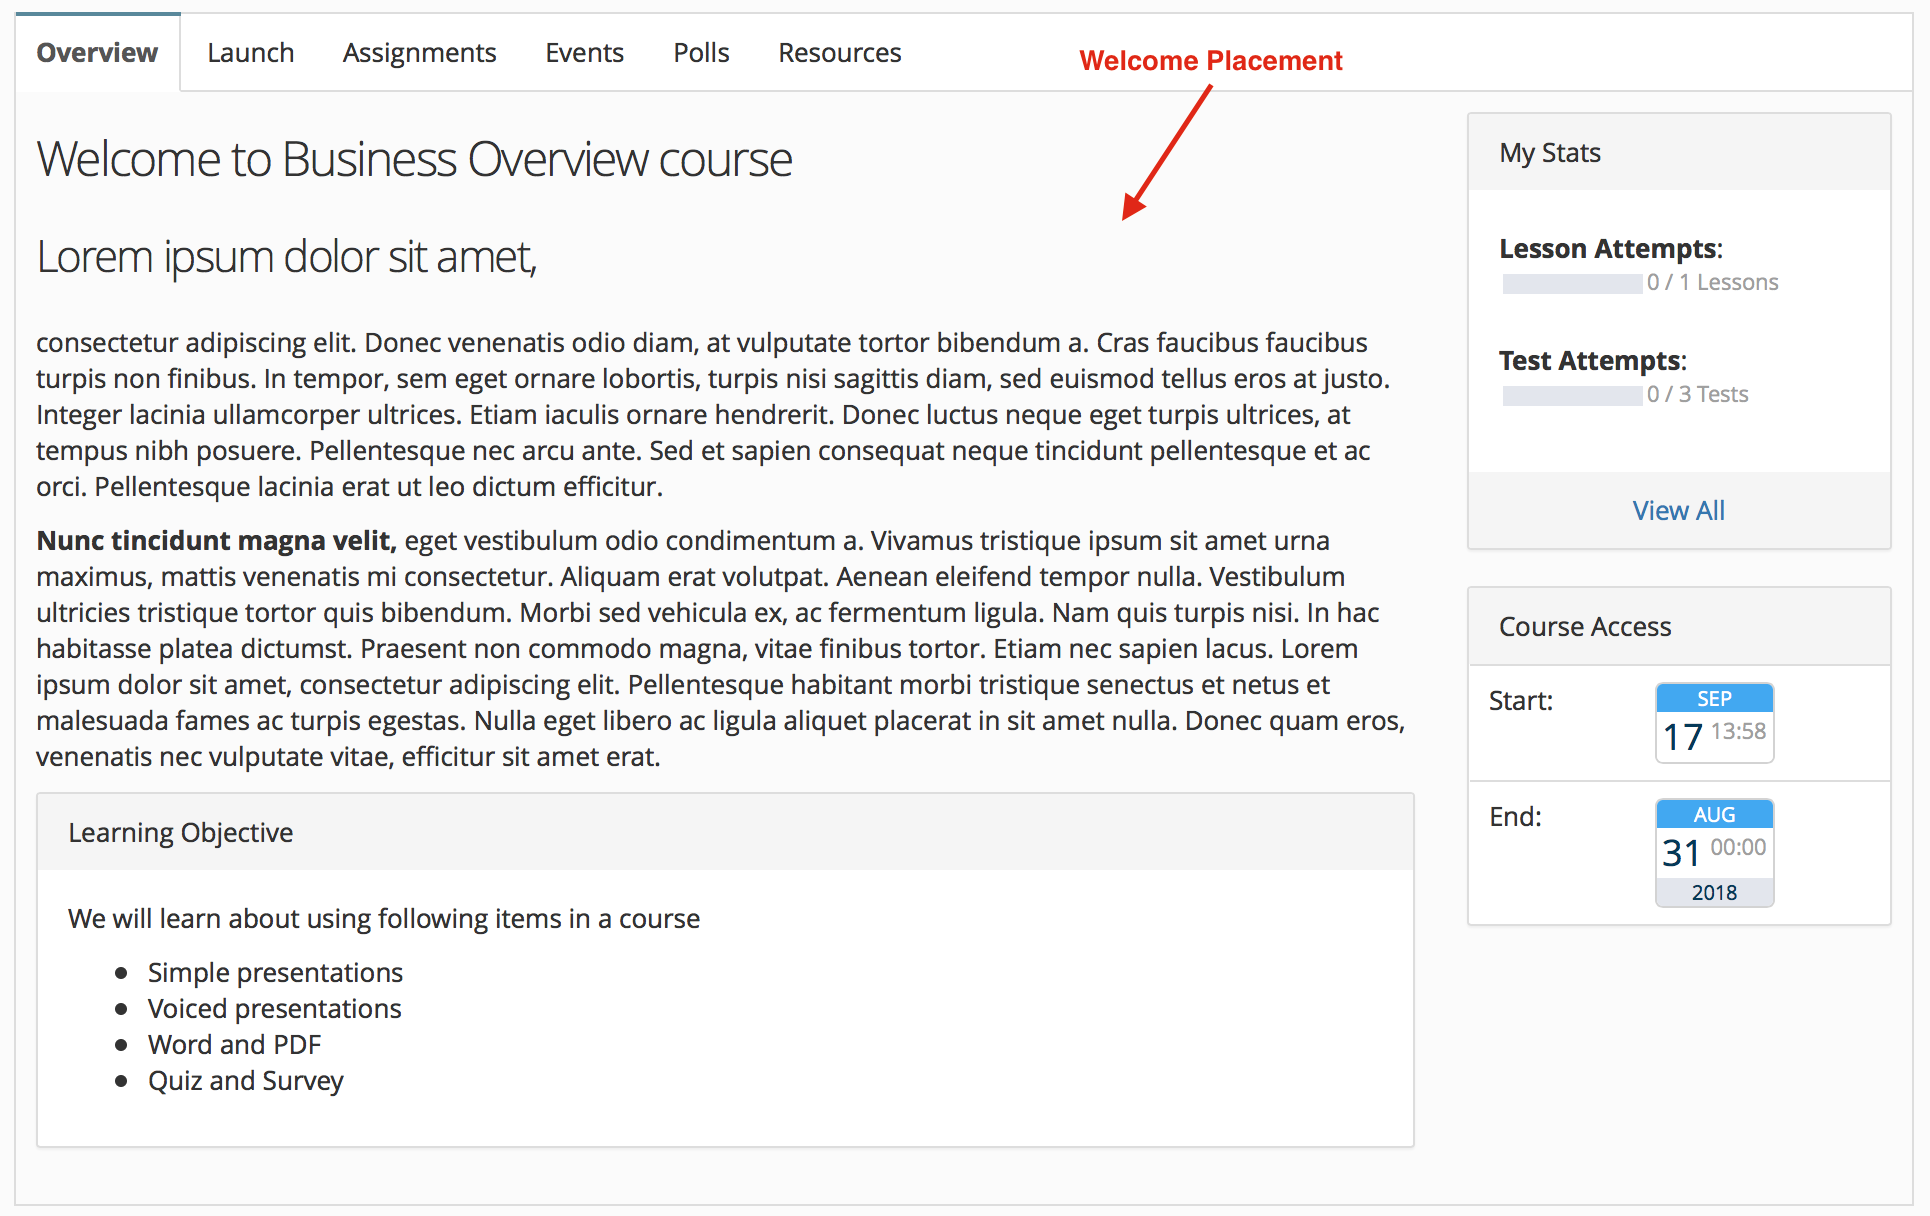
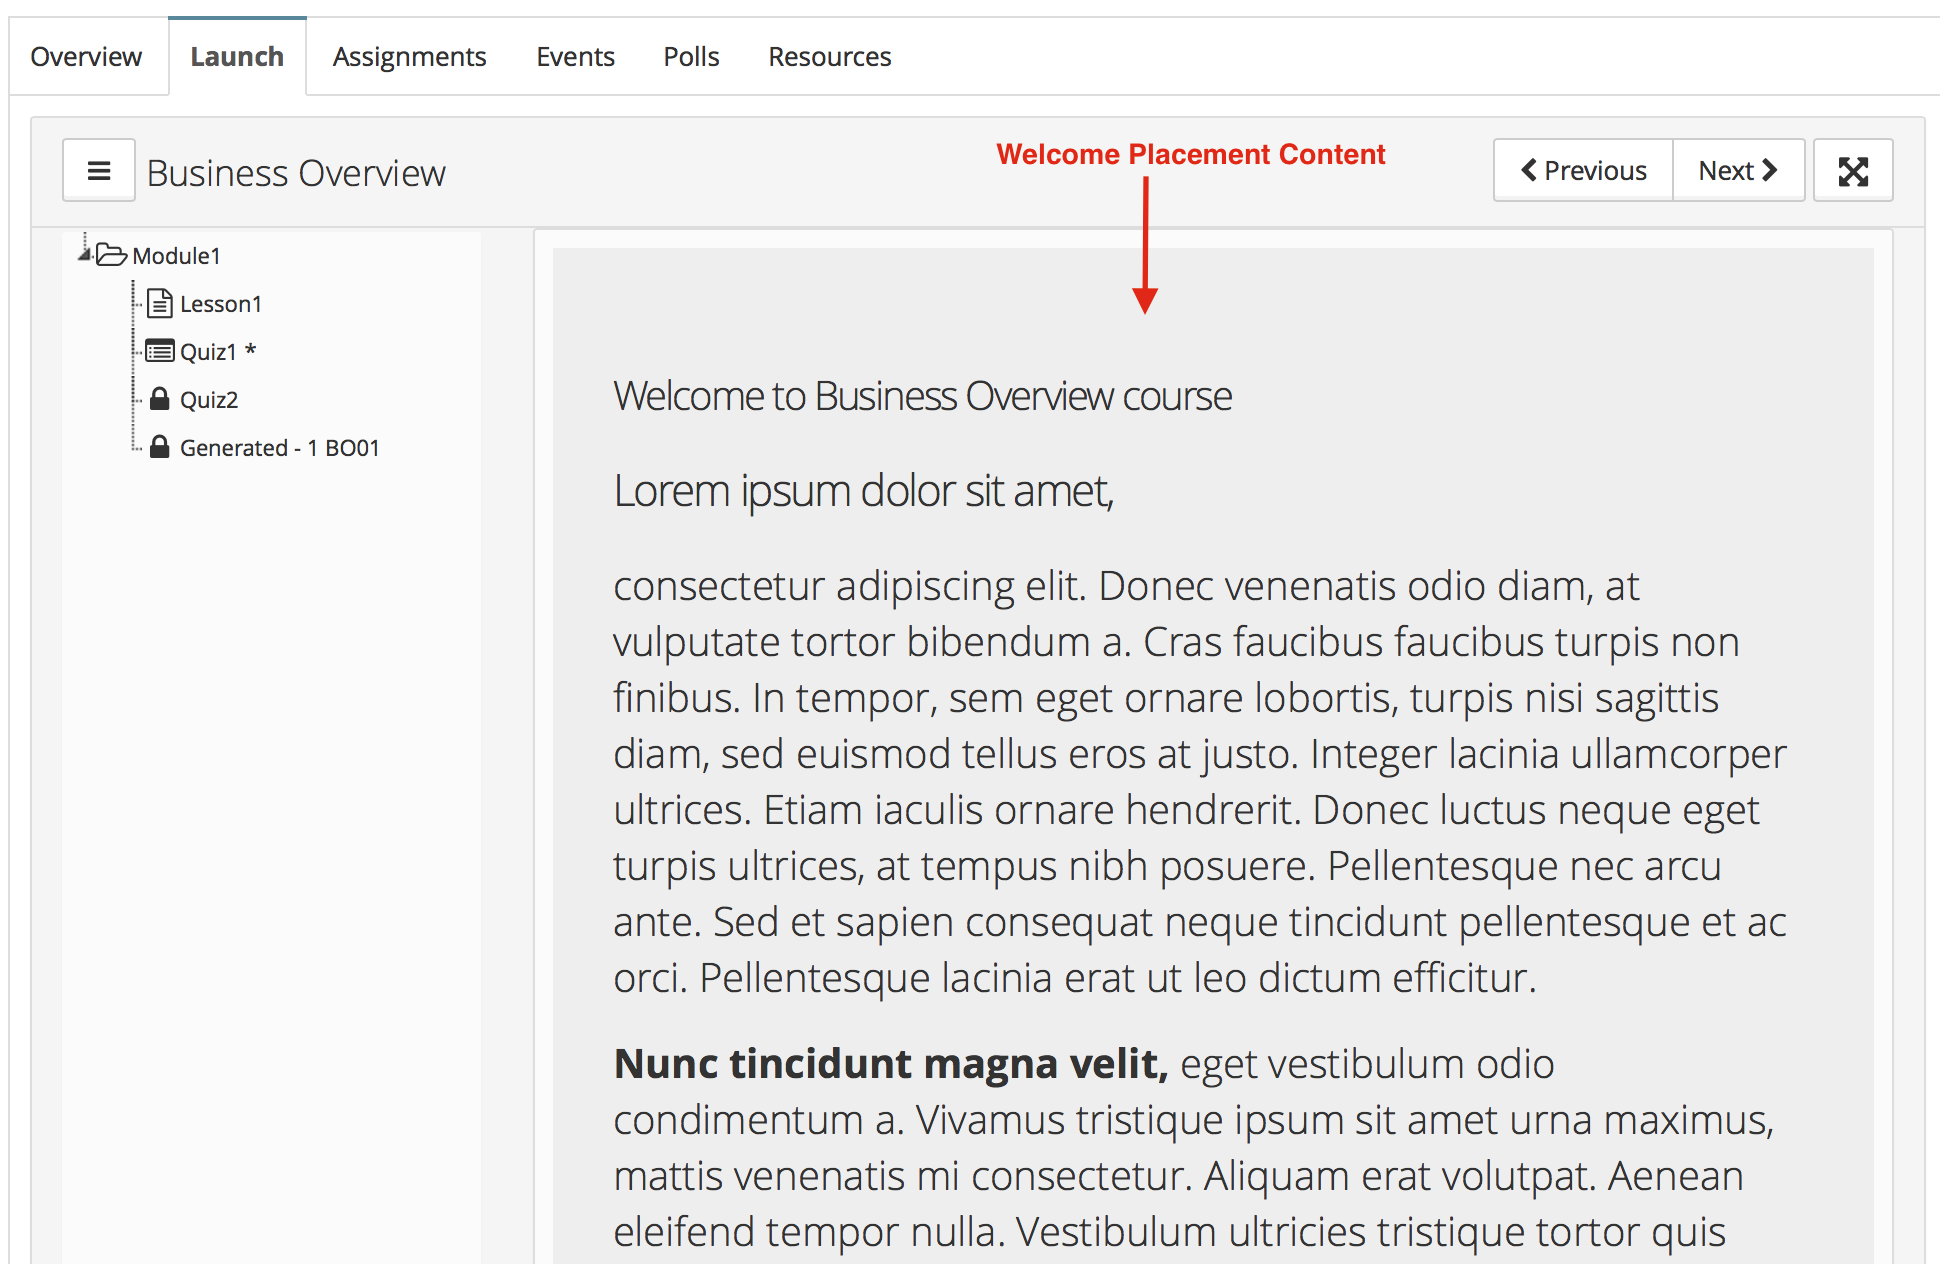
Course Welcome Placement
Welcome placement appears on course overview page after enrollment. By default Big banner placement appears before and after enrollment but if you want to show different message before and after enrollment, Add before enrollment message in big banner and after enrollment message in 'Welcome placement'
There is a site setting to turn off big banner after enrollment (SHOW_BIG_BANNER_OVERVIEW=false), It's useful if using welcome placement.
Course Player - Welcome message also appears as the first slide in course player.
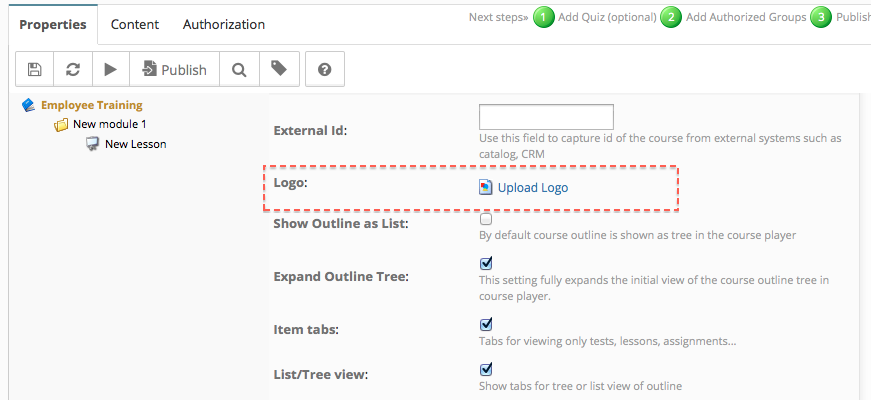
Logo Images
You can upload the logo in course, program or event (for event, open the Advanced Edit view for uploading logo), that would start showing up in tile images. Recommendation is to use Square images (like 200x200).
For replacing the default tile images set valid image url (absolute or relative.. relative is recommended) in following catalog settings
- Common tile image for course session
- Common tile image for event
- Common tile image for program session
E.g. create a site page in cms and name it resources. Attach an image to this page, say img1.png
You can then reference this image using relative url /oltpublish/cmsres/resources/img1.png , so in this case you could use following value in the custom property.
Common tile image for course session=/oltpublish/cmsres/resources/img1.png
Generic ICON in place of images
In place of logo images generic icons can also be presented for that enable catalog setting 'Show generic icons instead of thumbnail images' .
User Interface
- UI Customization
- Customization using Site Placements
- CSS Customizations
- Customizing Date Format
- Customize Sorting
- Customizing Labels (Captions)
- Signup Page Customization
- CMS Overview
- Getting Started with CMS
- Example of using CMS
- Catalog Customization
- Templates
Custom Properties
- Custom User Attributes
- Site level Custom Properties
- Custom property entity specific
- Multiple Languages / Default Language
- Custom File Types (Downloadable files)
Email Customization
- Email Templates Customization
- Email Override
- Email Variables
- Email Scripting - 6 Examples
- Add recommended Courses in completion email
