

There are multiple places that allow advanced customization. Here we are covering a few examples.
1.Dashboard Welcome Panel
Using predefined placements, a welcome panel can be added to the user's dashboard. In the welcome panel, a custom message can be placed. In this panel, conditional messages can be added based upon the user's group membership, course enrollment, program membership, etc.
Example - Adding a Group-specific Message
Velocity script can be placed to check the user's group membership and based on that, a group-specific message can be presented on the user's dashboard.
In the screen below a generic message is placed that will be presented to all users, and then a conditional message is placed for sales team members only.
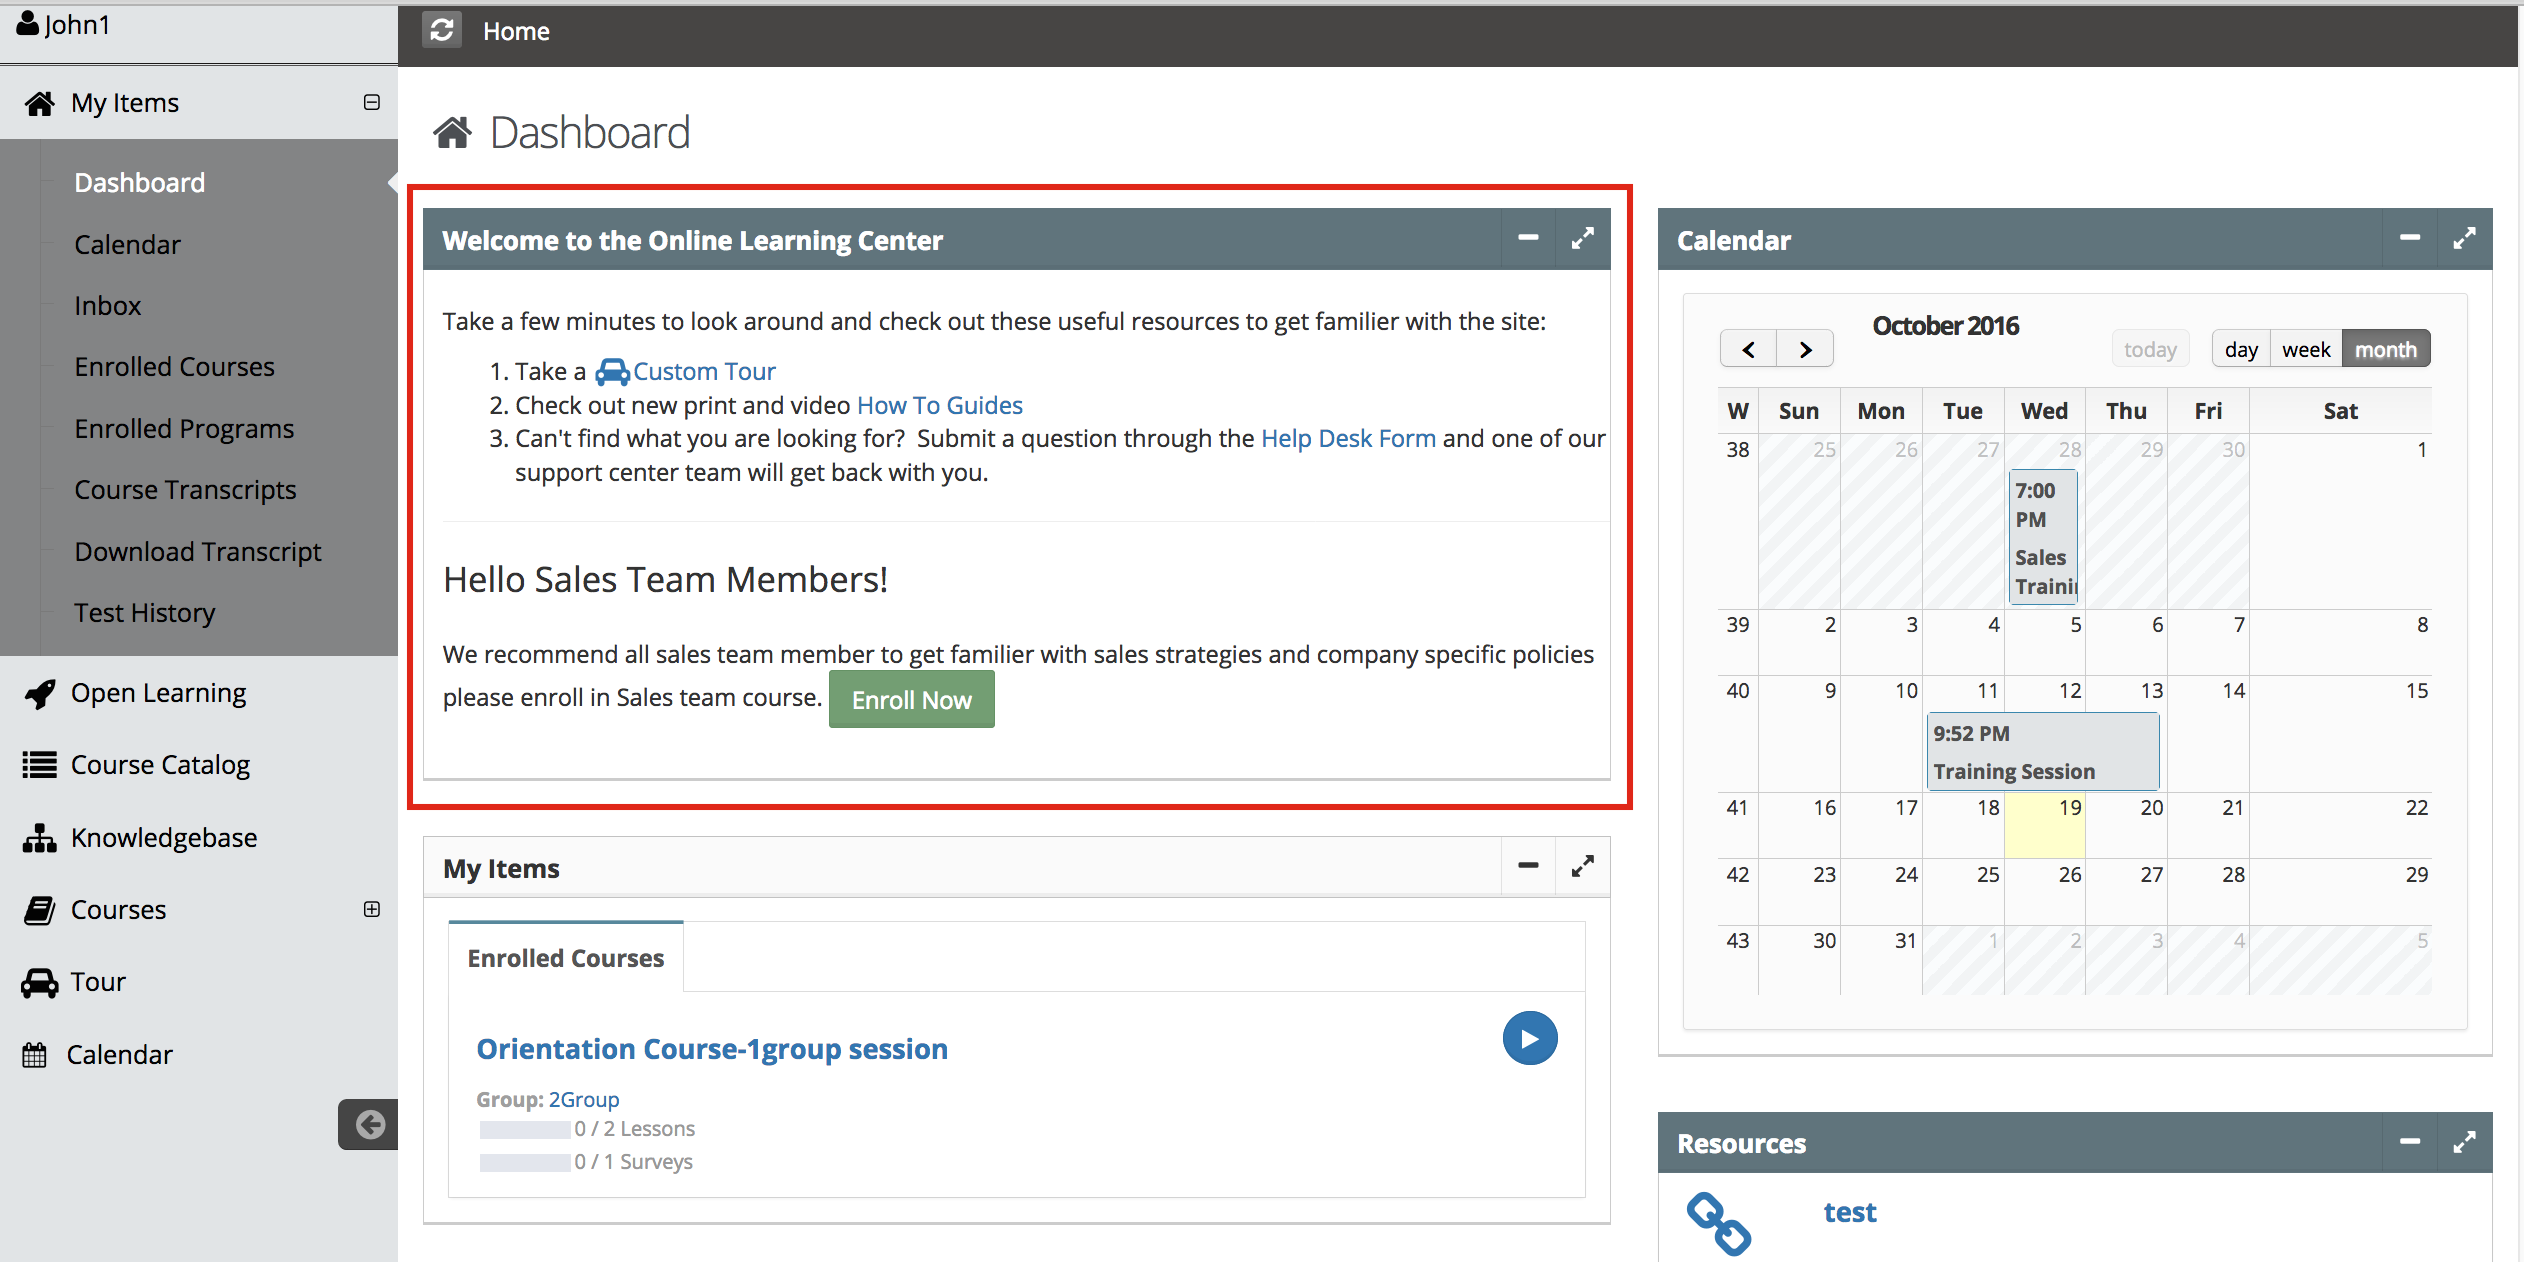
The welcome panel is added using HOME_TOP_PANEL placement and below the message with group membership condition is placed.
| <div class="jarviswidget jarviswidget-color-blue jarviswidget-sortable" data-widget-fullscreenbutton="true" data-widget-togglebutton="true" id= "welcomeWidget" role="widget"> <header> <div class="jarviswidget-ctrls" role="menu"> <a class="button-icon jarviswidget-toggle-btn" data-original-title="Collapse" data-placement="bottom" href="#" rel="tooltip" title=""><i class="fa fa-minus"></i></a> <a class="button-icon jarviswidget-fullscreen-btn" data-original-title="Fullscreen" data-placement="bottom" href= "javascript:void(0);" rel="tooltip" title=""> <i class="fa fa-expand"></i></a> </div> <h2><strong>Welcome to the Online Learning Center</strong></h2><span class="jarviswidget-loader" style= "display: none;"><i class="fa fa-refresh fa-spin"></i></span> </header> <div role="content"> <div class="widget-body no-padding"> <div style="padding-left:10px"> <br> <p>Take a few minutes to look around and check out these useful resources to get familier with the site:</p> <ol> <li>Take a <a href="../site/homeNew.do?tour=true&restartTour=true"> <i class="fa fa-lg fa-fw fa-car"></i>Custom Tour</a> </li> <li>Check out new print and video <a class="external_link" href="../theme-lms/cms.do?view=Guides">How To Guides</a> </li> <li>Can't find what you are looking for?Submit a question through the <a class= "external_link" href="../site/cms.do?view=contact_us">Help Desk Form</a> and one of our support center team will getback with you. </li> </ol> <hr> #if($UIContext.isActiveGroupMember("d22f0b0d-259c-11e5-aa01-002590f9ff98")) <h3 style="margin: 0 0">Hello Sales Team Members!</h3><br> <p>We recommend all sales team member to get familier with sales strategies and company specific policies pleaseenroll in Sales team course. <a class="btn btn-md btn-success" href= "/oltpublish/site/program.do?dispatch=showCourseSession&id=83214f0b-76e1-11e6-807c-0cc47a352510"> Enroll Now</a></p><br> #else #end </div> </div> </div> </div> |
There are many other conditions that can be checked including a user's program membership, course membership, and based on that, a specific message can be presented.
The welcome panel can also be used for placing tutorial/orientation videos or links for user guides etc.
2. My Items widget - Changing the Default Tab
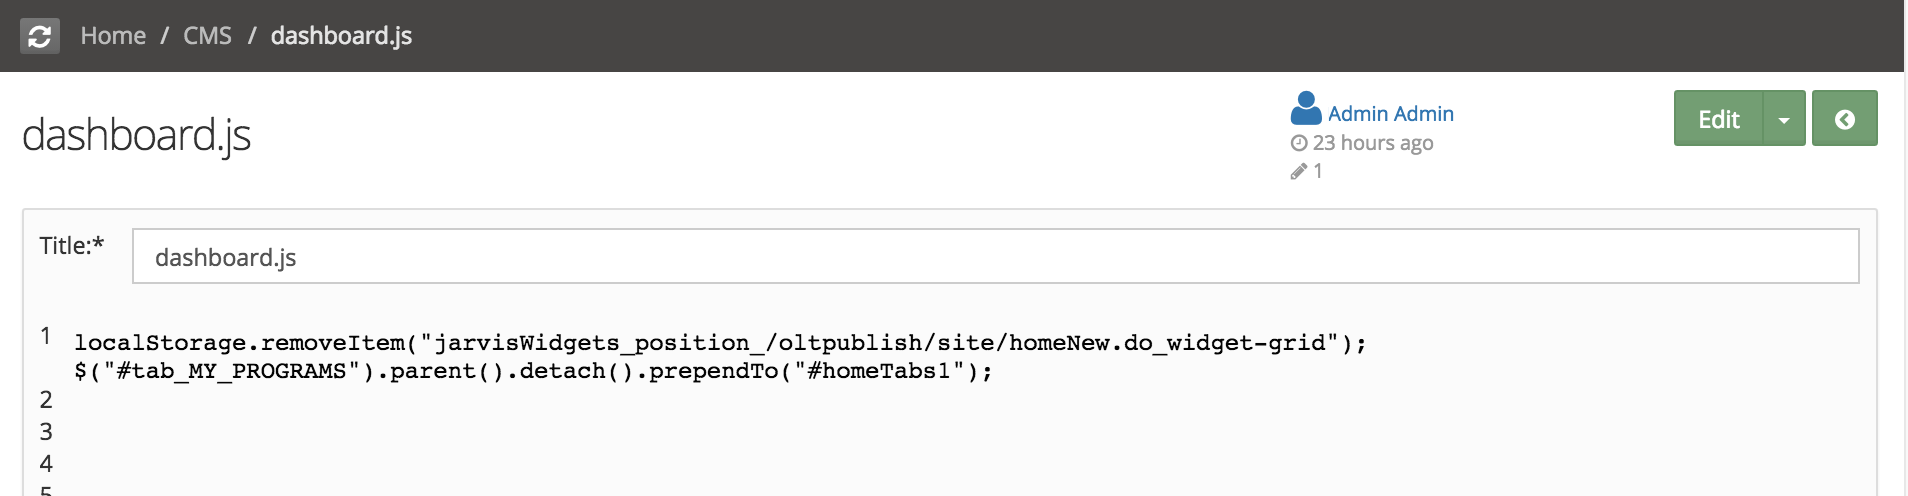
In the My Items panel, by default, enrolled courses appear as the first tab. Using the CMS, a data source can be created using the name 'dashboard.js' and the below code can be added to make Enrolled Program as the first tab.
Code:
| localStorage.removeItem("jarvisWidgets_position_/oltpublish/site/homeNew.do_widget-grid"); $("#tab_MY_PROGRAMS").parent().detach().prependTo("#homeTabs1"); |
3. Custom Navigation
A custom navigation menu can be created using Site Admin -> Placements -> V2 Navigation. That provides flexibility to arrange the menu links in the order you want. It also allows you to create new items in the navigation menu.
Custom menu example:
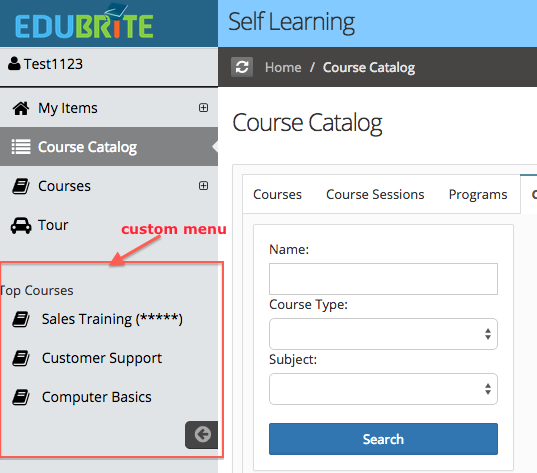
Example Code for V2 Navigation: In this example, the first default menu items are placed; after that additional links are added in the navigation menu if the user is a guest or learner (ie: Not Admin or Site Admin).
| ${UIContext.getUiManager().getTopNav().getHtml()} #if (! $UIContext.isAdminOrSiteAdmin() ) <hr/> Top Courses <ul class="customMenu"> <li><a href="/oltpublish/site/program.do?dispatch=showCourseSession&id=f311a22b-6c54-11e4-bc5a-00163e0054ca" target="_parent" ><i class="fa fa-lg fa-fw fa-book"></i> <span class="menu-item-parent">Sales Training (*****)</span></a></li> <li><a href="/oltpublish/site/program.do?dispatch=showCourseSession&id=f311a22b-6c54-11e4-bc5a-00163e0054ca" target="_parent" ><i class="fa fa-lg fa-fw fa-book"></i> <span class="menu-item-parent">Customer Support</span></a></li> <li><a href="/oltpublish/site/program.do?dispatch=showCourseSession&id=f311a22b-6c54-11e4-bc5a-00163e0054ca" target="_parent" ><i class="fa fa-lg fa-fw fa-book"></i> <span class="menu-item-parent">Computer Basics</span></a></li> </ul> #end |
User Interface
- UI Customization
- Customization using Site Placements
- CSS Customizations
- Customizing Date Format
- Customize Sorting
- Customizing Labels (Captions)
- Signup Page Customization
- CMS Overview
- Getting Started with CMS
- Example of using CMS
- Catalog Customization
- Templates
Custom Properties
- Custom User Attributes
- Site level Custom Properties
- Custom property entity specific
- Multiple Languages / Default Language
- Custom File Types (Downloadable files)
Email Customization
- Email Templates Customization
- Email Override
- Email Variables
- Email Scripting - 6 Examples
- Add recommended Courses in completion email
