

In a microsite, you can customize email templates, to implement customized messages and formatting. There are two levels of customizations possible to change the formatting of emails.
1. Changing the header and footer of html text in the emails
Goto SiteAdmin->Placements and edit EMAIL_HEADER or EMAIL_FOOTER placement.
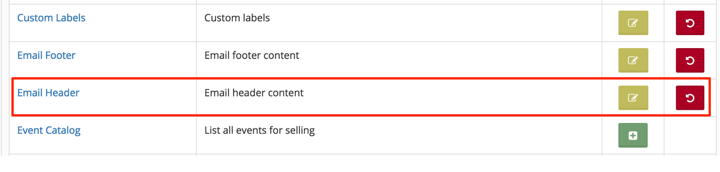
The default content for these placements is given below, which you can change. All emails will use the overridden content once you populate these placements.
Header
Header content starts the html and body tag, and opens a DIV for actual content of the email (which gets generated by specific templates, as described in step 2 below), In the header section you can use any image, For that you can first create a site page in CMS and upload the image in cms page, get the image path, Use that path for image source.
E.g. if you create a cms page by giving name as myimages then upload the image in that page, image name is mylogo.png, then you can access that image using the URL http://<yoursite.edubrite.com>/oltpublish/cmsres/myimages/mylogo.png
|
<html> <img alt="Microsite Logo" src="http://test.edubrite.com/oltpublish/cmsres/myimages/mylogo.png" hspace="5px" align="left"/> |
Footer
Footer ends the content, body and html tags.
</div> <div style="border-top:1px solid #AAAAAA;margin-top:20px; text-align:center;font-size:10px"> <p style="font-size:8px;">Automated email generated from a customer microsite hosted on EduBrite platform.</p> </div> </div> </div> </body> </html> |
2. Changing the Email content in templates
Edurite platform provides several email templates which you can customize to achieve customized messaging in email content. To begin with customizing email templates,
- Go to Site Admin->Email Settings
- On the Email Settings page you will see several tabs, first tab captures some settings related to email at the site level. Other tabs provide ability to customize specific emails which get generated by the system. You can view each tab to see the listing of specific email, and enable or disable it.
- By default - all emails are enabled, to disable a email uncheck the Enable check box corresponding to that email type.
- To update the default email template content, Click
 ( plus icon) corresponding to the email type you want to update. You will be taken to General settings tab, come back to same tab you will notice a
  edit icon. Click Edit icon it will show the default content, Click Edit - Update the content then save and publish.
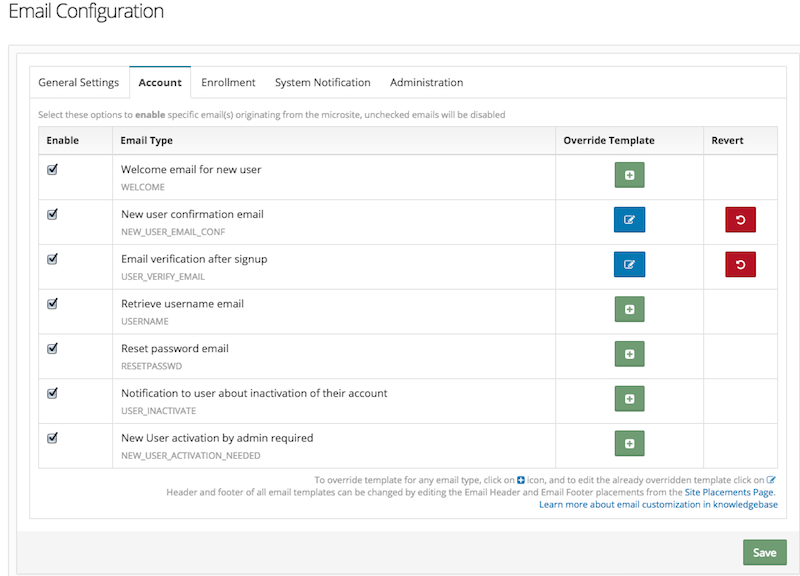
- Once email template is published, changes will become effective (as long as they are in draft mode, they updates won't get picked up)
- You can refer to Email Variables and use them in the content of email template
Example template for Reset Password emails
<template type="RESETPASSWD" subject="Reset your password at __SITE__" >
            <header>
            </header>
            <body>
                <![CDATA[Hi __FNAME__,
                <p>__SITE__ received a request to reset a password associated with this e-mail address. If you didn't request this, you can safely ignore this email.<br/><br/>
                If you requested to reset your password, click on the URL below<br/>
                <a href="__URL__" target="_blank">__URL__</a>
                </p>
                <br/>
                <br/>Regards
                <br/>Support]]>
            </body>
        </template>
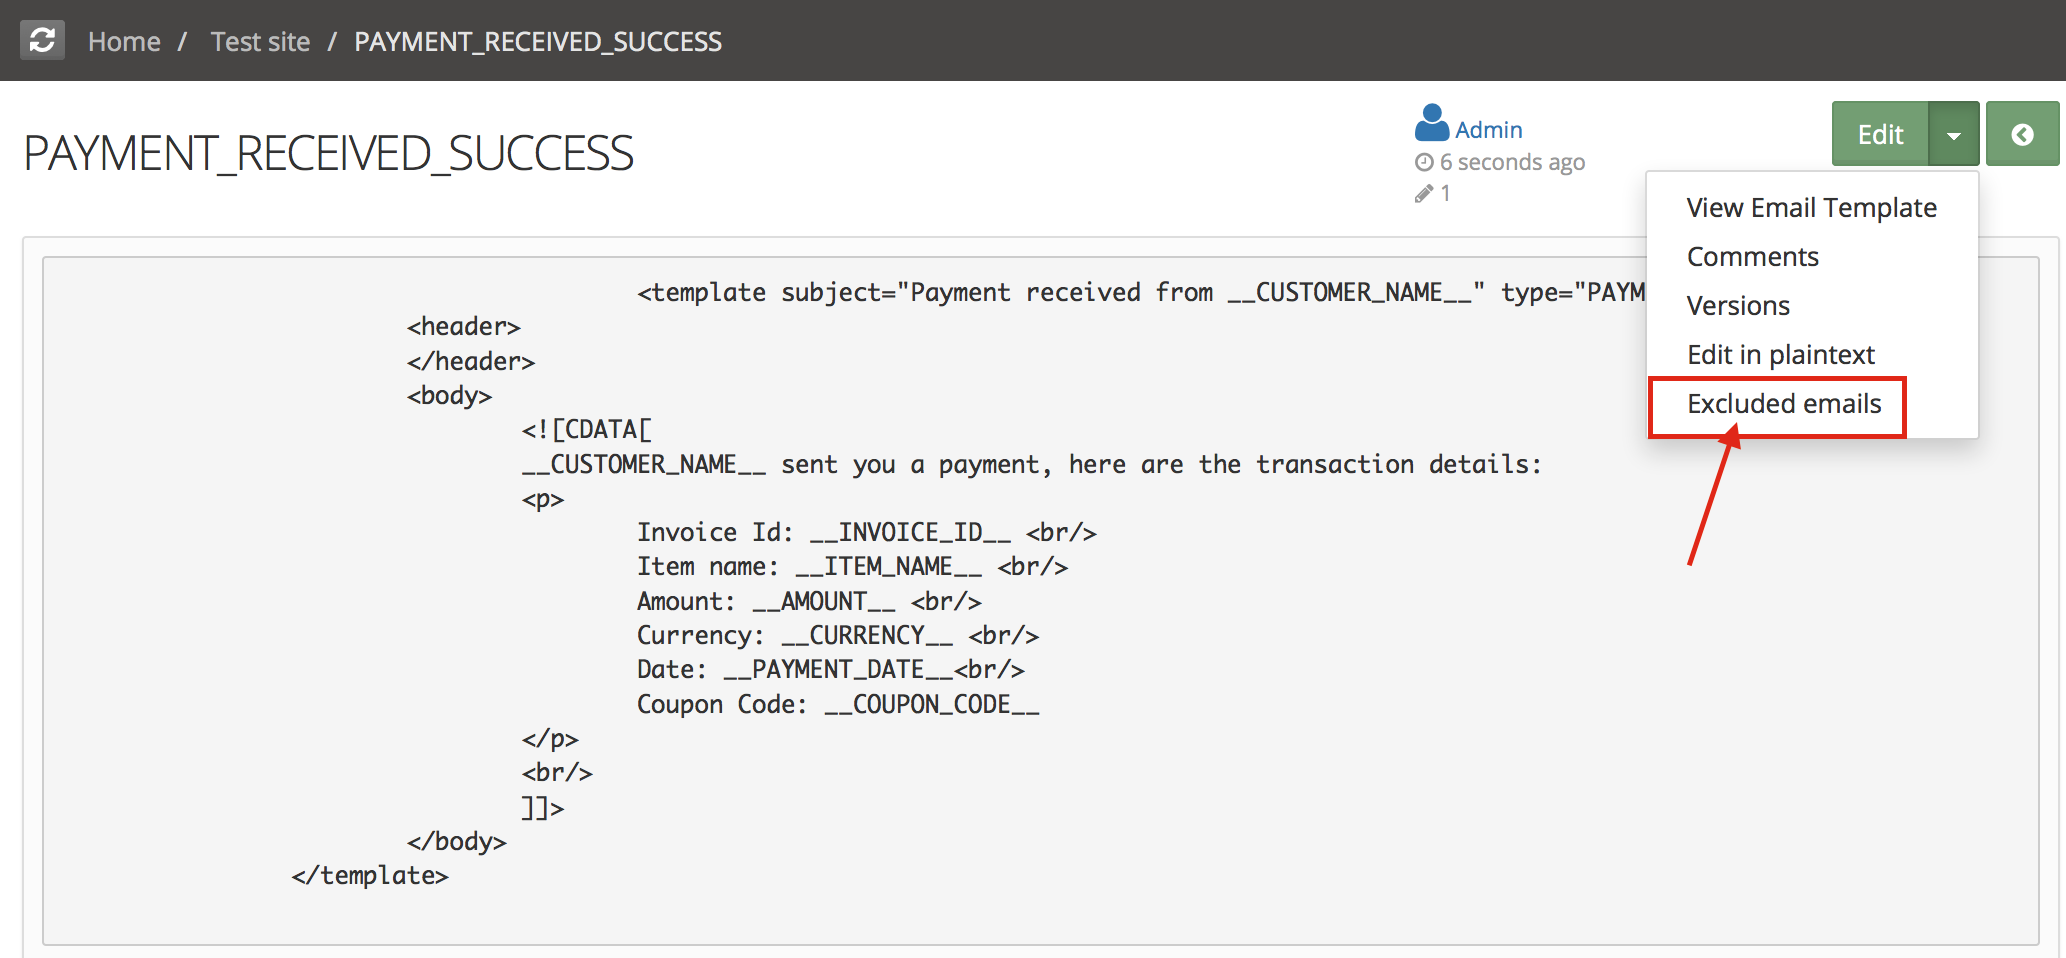
3. Adding Email Exclusion List
For every Email Type a excluded email-ids list can be added. When that email is triggered if receiver's email-id is present in excluded email list, email will not be sent to the user. This list is useful to control site admins notifications/ instructors notifications. By default all site admin receives all admin notifications if you want to remove few admins receiving a specific email type, add those user's email-id in that email exclusion list.
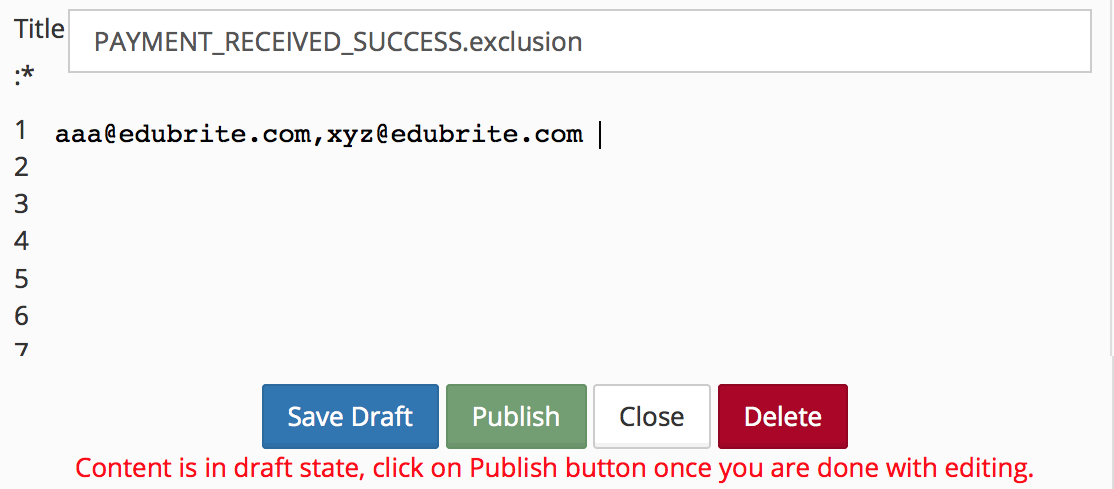
To add multiple emailids in excluded list comma separated emailids should be added. Save and publish the list.
Example shows excluding few emailids for Payment receive notifications -
Additional Resources:
Watch Video :
- Email variables used in the template
- Scripting inside Email templates
- Email Template Scripting Example
User Interface
- UI Customization
- Customization using Site Placements
- CSS Customizations
- Customizing Date Format
- Customize Sorting
- Customizing Labels (Captions)
- Signup Page Customization
- CMS Overview
- Getting Started with CMS
- Example of using CMS
- Catalog Customization
- Templates
Custom Properties
- Custom User Attributes
- Site level Custom Properties
- Custom property entity specific
- Multiple Languages / Default Language
- Custom File Types (Downloadable files)
Email Customization
- Email Templates Customization
- Email Override
- Email Variables
- Email Scripting - 6 Examples
- Add recommended Courses in completion email
