

Getting Started with Gilly
A fully functional Gilly setup inside Confluence requires the following few steps.
- Create and Configure an EduBrite Business Account
- Install Gilly plugin inside Confluence
- Configure Gilly to link with the EduBrite Business Account
Create and Configure an EduBrite Business Account
-
Create an EduBrite Business account by signing up on accounts.edubrite.com

-
Login to your Business Account (also called microsite) & open Site Admin->Site Details page from the menu
-
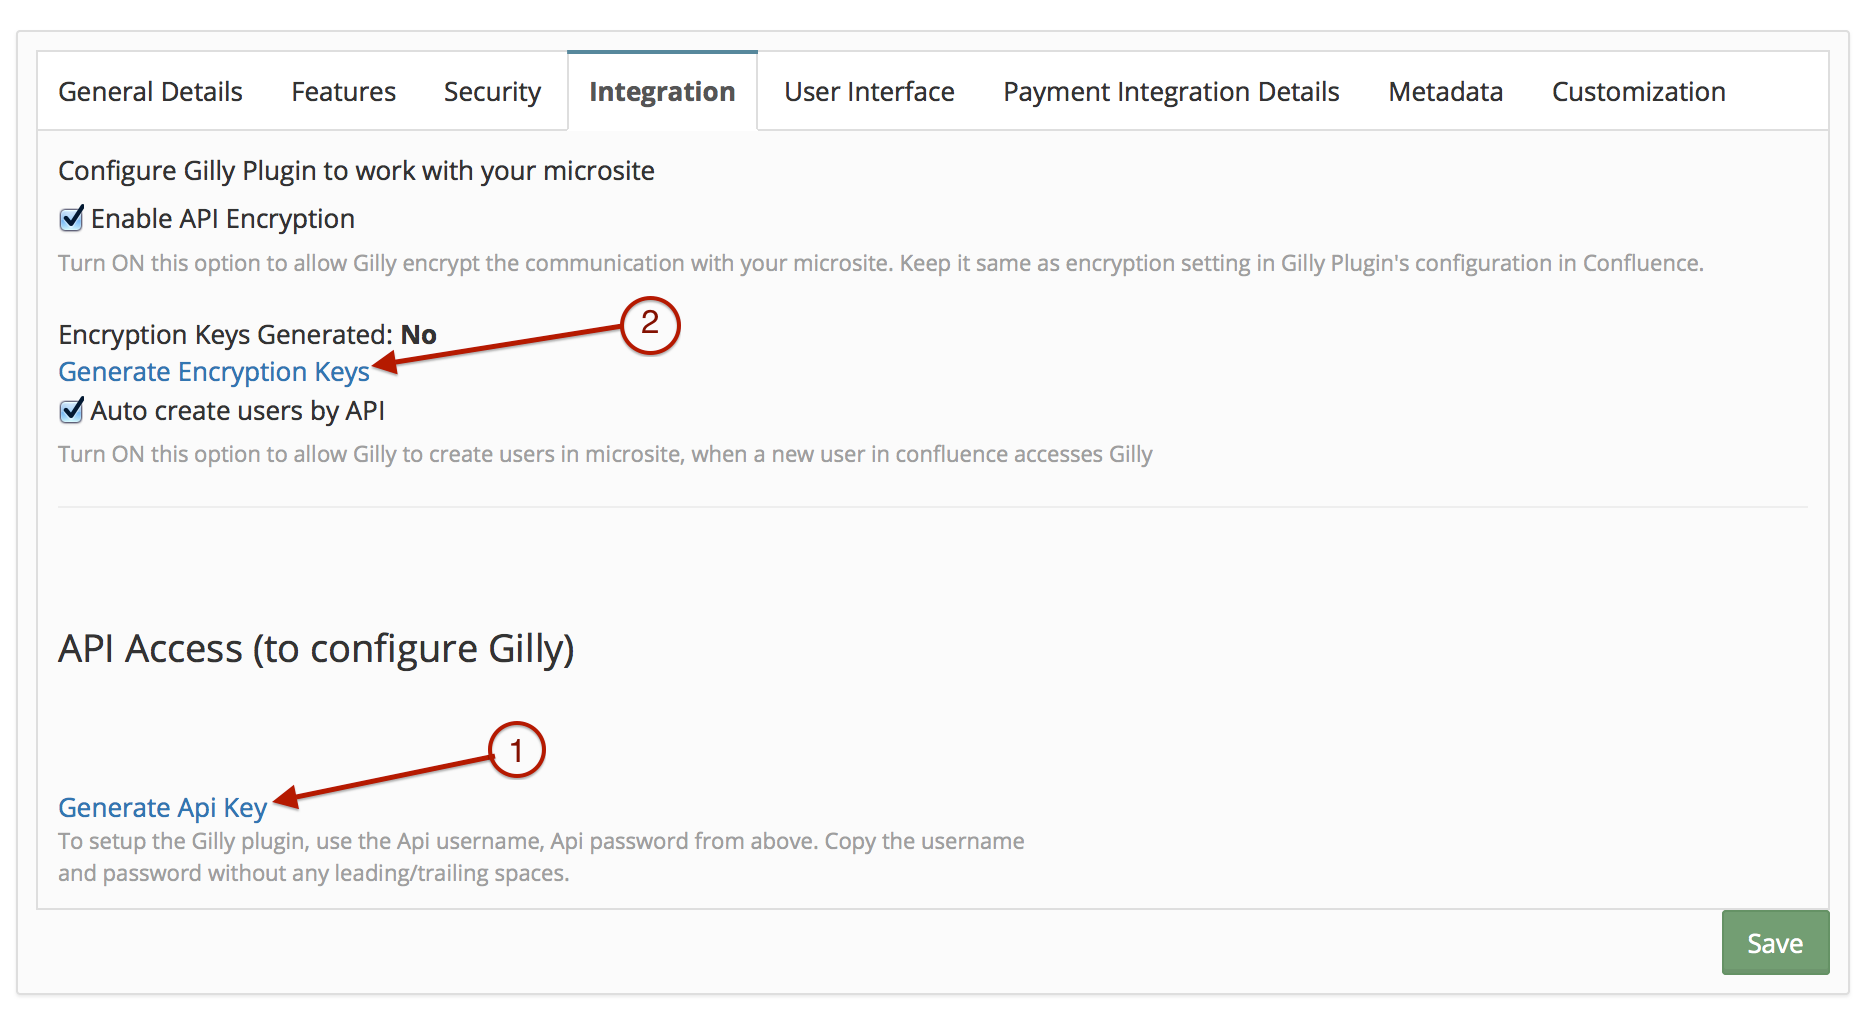
On the site details page, open the Integration tab, Click on the Generate API Key link to generate a username and password for accessing your microsite via API. You would later use this username and password to configure Gilly as specified in the third step
-
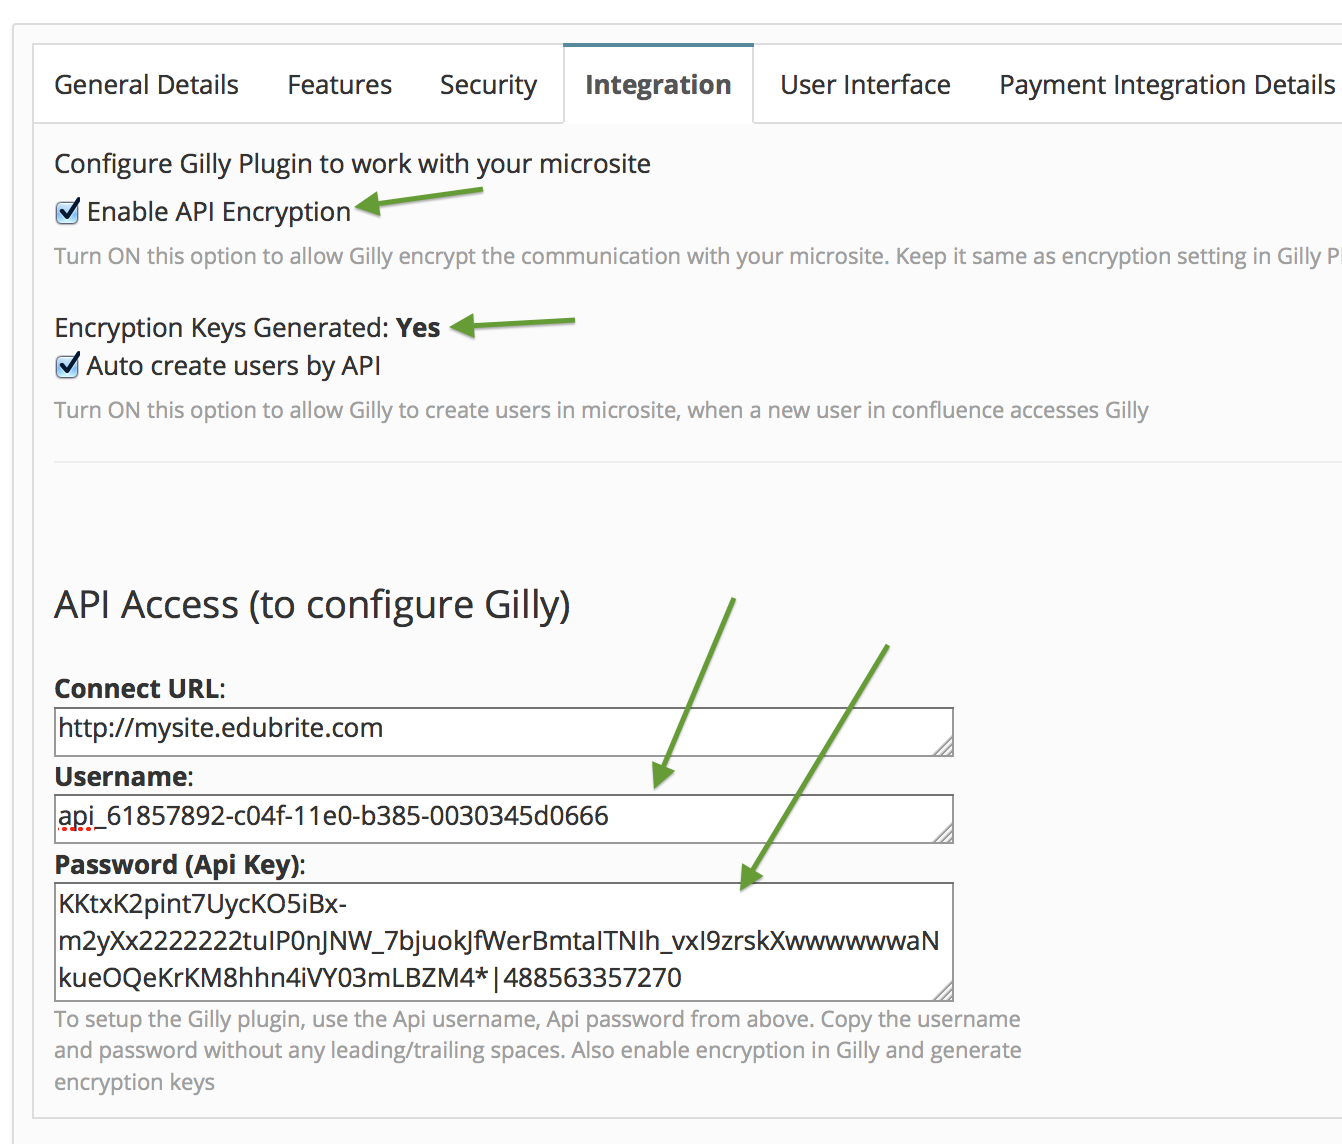
From the same tab, now click on Generate Encryption Keys, to generate keys for secure communication between your microsite and Gilly plugin. The integration page would now appear similar to as shown below
Install Gilly Plugin
-
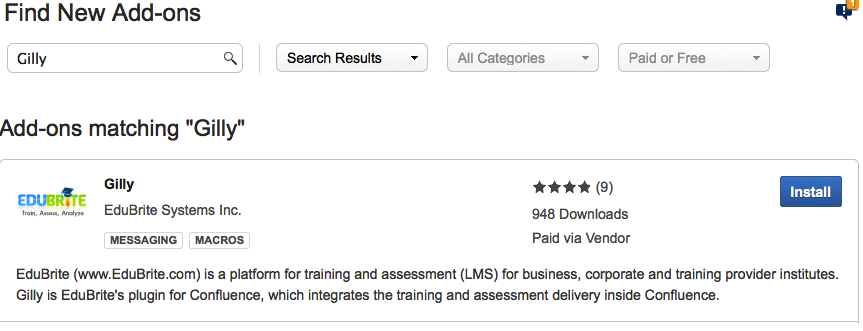
Login to Confluence as administrator and Open Browse->Confluence Admin->Find add-ons page.
-
Search for Gilly plugin by using the search box
-
When Gilly details are displayed, click on the Install button, which you can find below the plugin details. This would install Gilly plugin inside Confluence
-
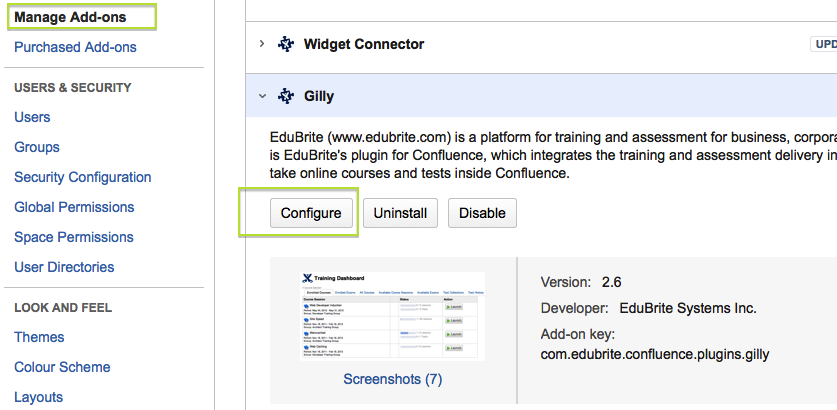
Cick on Manage button after its installed to go to next step of configuring the parameters
Configure Gilly Plugin to link with EduBrite Business Account
-
Once plugin is installed, open the Manage add-ons page, and expand Gilly plugin's details and click on Configure button
-
Enter the URL of the site, username and password corresponding to API username and key from your microsite details page (Integration tab)
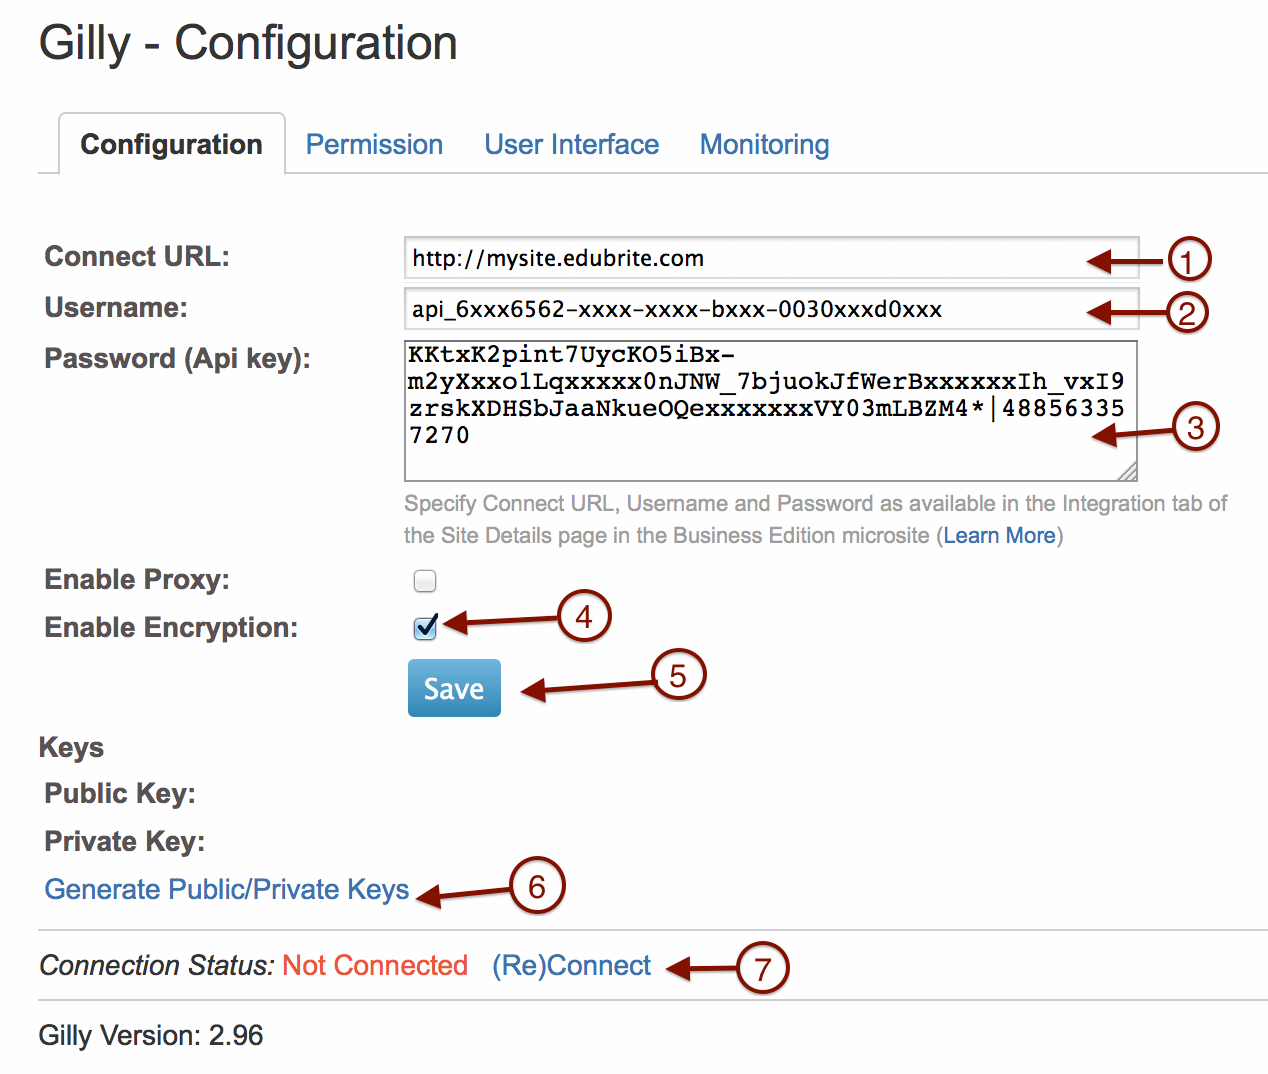
-
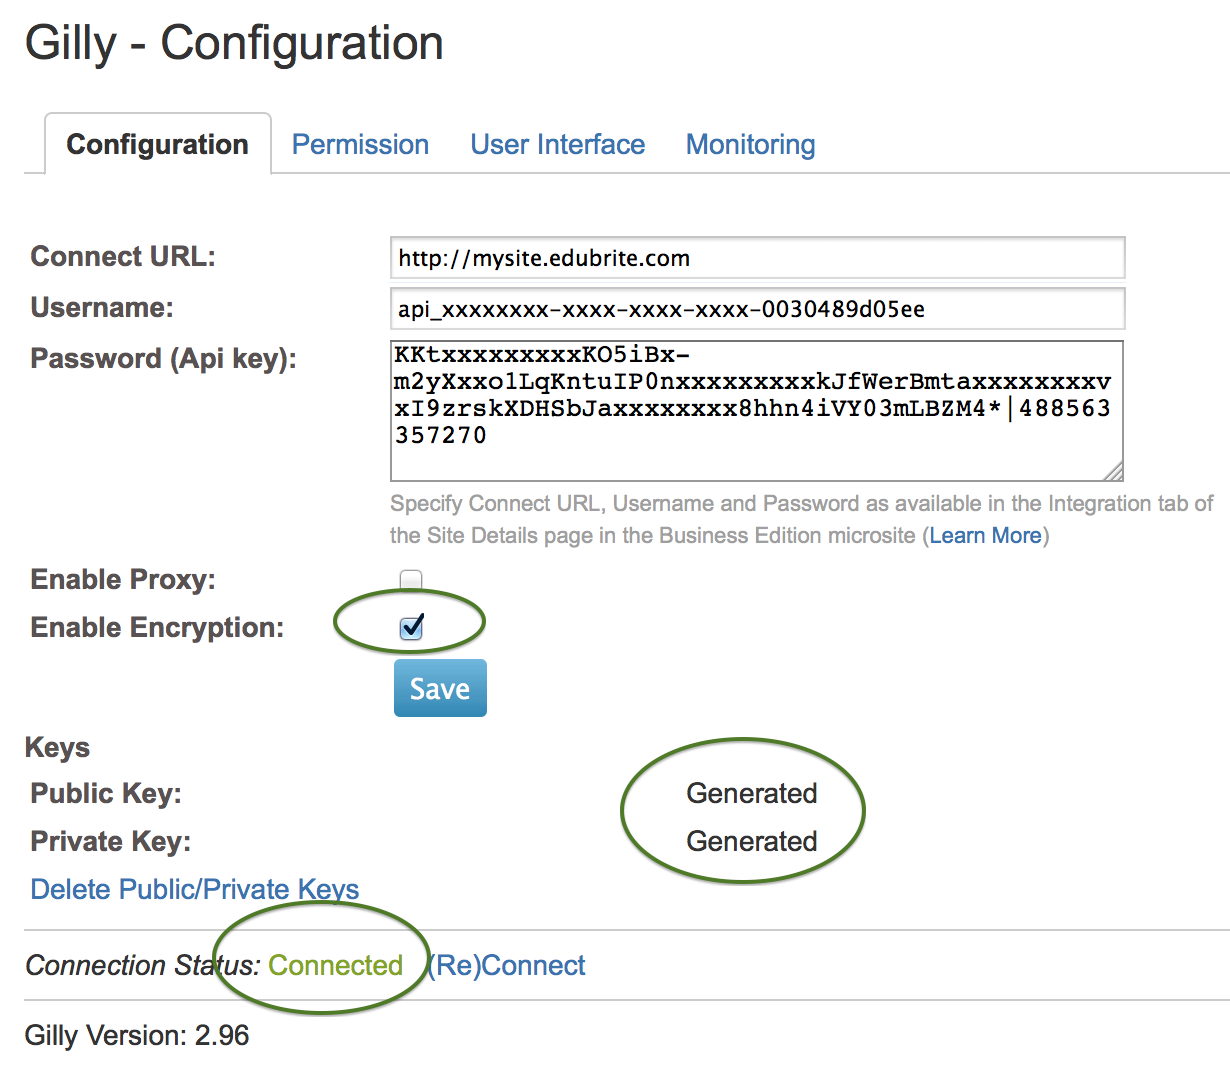
Check the Enable Encryption option and save. Once saved, click the Generate Keys link to generate the public private keys for communication between Gilly and EduBrite Business Account
-
Click Submit button to save the configuration settings.
-
Gilly requires outbound http connectivity to your lms microsite so in case direct connection is not available from confluence server, you can specify proxy connection parameters by following this article.
-
Click on (Re)Connect link to test the connectivity between Gilly and microsite
-
A successful connection would be indicated through the status on this page as Connected, upon which you can start using the plugin. Click on Browse->Test Collections menu to browse groups in your microsite which have tests in them
See Also - Gilly Upgrade Instructions
Next Steps
- Setup Confluence URL in microsite (to have correct url link in enrollment emails sent from the microsite)
- Synchronize users and groups from confluence to microsite
Gilly Articles
- Quick Start with Default Settings
- Getting Started
- Gilly for Confluence Cloud
- Gilly's Architecture
- Proxy Setting
- User Management inside Microsite
- User Management inside Gilly
- Access Control and UI Configuration
- Caching of Items
- Training Dashboard
- Managing default Training Dashboard
- User Profile Extension (Custom tabs)
- Visibility Control and UI configuration
- Course Player Macro
- Quiz / Survey Macro
- Creating Exams
- Survey Delivery
- Test Attempts Report
- Test Statistics Report
- Survey Report
- Upgrading Gilly to a new version
- Monitoring
- Logging in Gilly
- Gilly Releases & Downloads
Gilly Webinars
Gilly Demo
URL: http://gillydemo.edubrite.com
Username: demo1, demo2
Password: password
EduBrite Platform Demo
URL: http://learnzone.edubrite.com

Comment