

Customization using callback methods
Test taking flow can be customized using predefined call back hooks provided in the system. These call back books are integrated when taking test as a part of course.
To Enable these methods on lms site - Add a custom property ENABLE_TEST_WATCH=true in Site Admin - Customization tab.
| Method | Action call |
| takeCB | calls on Take Test action |
| openCB | calls when test opens |
| finishCB | calls when user clicks 'Finish' button |
| saveCB | calls when user clicks 'Save' |
| pauseCB | calls when user clicks 'Pause' |
| resumeCB | calls when user clicks 'Resume' |
| questionShown | calls when a question loads ( for every question) |
You can add the test watcher code via a data source created in CMS. To do this, go to Site Admin->CMS and create a new data source. Name this data source test-watcher.js
You can write test-watcher to receive callbacks from any test taking activities mentioned in above table.
Example 1 - takeCB :
This example shows how a test specific message can be shown when user clicks 'Take Test'
In the test two custom properties are added -
TAKE_TEST_MESSAGE - true/false
MESSAGE - "Test specific message"

JS Code
try{ eb_TestWatcher = { takeTest_action_Needed: false, message : null, takeCB: function(ti,widg){ if(widg.viewController.test.customProperties && widg.viewController.test.customProperties.length > 0) { for(var i=0; i<widg.viewController.test.customProperties.length; i++){ if(widg.viewController.test.customProperties[i].name == 'TAKE_TEST_MESSAGE' && widg.viewController.test.customProperties[i].value == 'true'){ this.takeTest_action_Needed = true; } if(widg.viewController.test.customProperties[i].name == 'MESSAGE'){ this.message = widg.viewController.test.customProperties[i].value; } } if(this.takeTest_action_Needed){ this.takeTest_action_Needed = false; alert(this.message); } } } }; }catch(er){ alert(er); } |
Learner's experience :
When learner will click take test, If that test has custom property 'TAKE_TEST_MESSAGE' set as true and MESSAGE is present. Message will appear.
If these properties are not set in the test no message will be presented.
Example 2 - finishCB
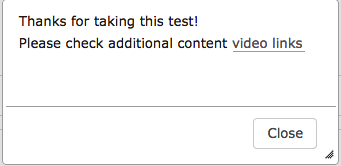
This example shows to display a external link when user clicks Finish button in the test.
By using test custom property a test specific links can be added.

JS Code
try{ eb_TestWatcher = { save_action_needed: false, ref_video_url: null, constructed: null, finishCB: function(ti, widg){ if(widg.viewController.test.customProperties && widg.viewController.test.customProperties.length > 0) { for(var i=0; i<widg.viewController.test.customProperties.length; i++) { if(widg.viewController.test.customProperties[i].name == 'VIDEO_URL') { this.save_action_needed = true; this.ref_video_url = widg.viewController.test.customProperties[i].value; } } } if(!this.constructed && this.save_action_needed){ this.save_action_needed = false; this.constructed = $(document.createElement('div')); this.constructed.html("Thanks for taking this test! <br/> For additional content <a href= " + this.ref_video_url + ">video links</a>"); } var me = this; this.constructed.dialog( { autoOpen: false, modal: true, buttons: { Close: function() {me.done();} } } ).dialog("open"); }, done: function() { var me = this; me.constructed.dialog("close"); }, }; }catch(er){ alert(er); } |
Learner's experience :
When user click 'Finish' to submit the test, A popup message appears with the related videos url.
 |
Example 3 - show custom result page
In this example let's look at how to show a customized result page.
JS Code (you can place this code by creating a data source named test-watcher.js in Site Admin->CMS
eb_TestWatcher = {
finishCB: function(ti, wid) {
     $("#testDiv").hide();
         setTimeout(function(){
           if(wid.viewController.test.name != "Getting Started Checklist"){
             return;
           }
           var args = "correct="+ti.noOfCorrect+"&incorrect="+ti.noOfIncorrect+"&total="+wid.viewController.test.numQuestions;
           if(ti.pass){
             g_navigateTo("../site/cms.do?inner=true&view=passed&"+args);
           }else{
            g_navigateTo("../site/cms.do?inner=true&view=notpassed&"+args);
           }
     },1000);
}
} |
HTML code for notpassed (create a site page in CMS with name notpassed and paste the below code in source view.
<h1>You have some incorrect answers</h1> <div> <h3><i class="fa fa-check"></i> Correct: <span id="done"> </span></h3> <h3><i class="fa fa-times"></i> Incorrect or Not Attempted: <span id="pending"> </span></h3> </div> <script> try{ var correct = 0, incorrect = 0, total = 0; var url = location.href; url = url.substring(url.indexOf("&")+1); var nv = url.split("&"); for(var i=0;i<nv.length; i++){ var nvp = nv[i].split("="); if(nvp[0] == "correct"){ correct = parseInt(nvp[1], 10); }else if(nvp[0] == "incorrect"){ incorrect = parseInt(nvp[1], 10); }else if(nvp[0] == "total"){ total = parseInt(nvp[1], 10); } } }catch(er){} $(document).ready(function(){ $("#done").html(correct+""); $("#pending").html((total-correct)+""); }); </script> |
HTML code for passed (create a site page in CMS with name passed and paste the below code in source view.
<h1>Great! you have completed all the expected tasks successfully.</h1> |
Example 4 - questionShown
Please check use case for questionShown example.
These simple examples are created to describe these methods use, Using these methods combined with test custom properties test specific flow can be fully customized as per need.
Quiz Delivery
- User Test Taking Experience
- Test Collections
- Poll (Short Survey)
- Allow Only Forward Navigation in quiz/survey
- Restrict Quiz Attempts
