

Creating an org hierarchy is based on the concept of sub-groups within any group. A group can contain multiple child groups which in turn can contain more sub-groups. To use this capability, you need to enable the Org Hierarchy feature from the Site Admin->Site Details->Features tab
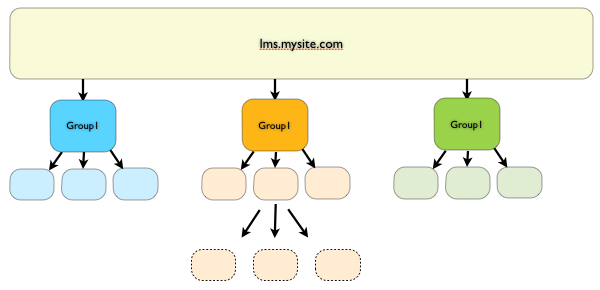
When this feature is on, you can create an org structure such as the example we are including here:
- Corporate
- Customer Support
- Engineering
- Build & Release
- Development
- Quality Assurance
- Human Resources
- Sales
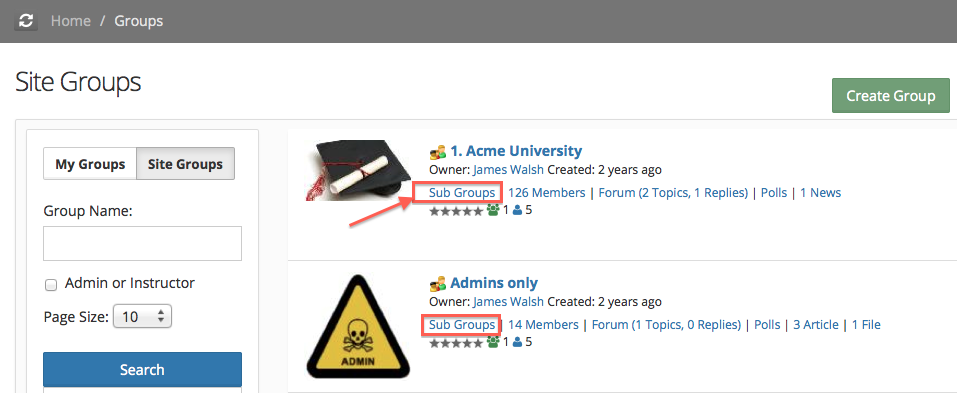
Create a group named Corporate at the top level. On the groups listing from the Groups tab, you would only see the top-level groups. There is a Sub groups link to drill down into any particular group and view its subgroups.
Site groups tree view - the site groups structure can also be accessed in a tree view; to enable the groups tree view, add a custom property in the site customization tab: GROUP_TREE_VIEW=true. If the setting is enabled, the group listing page provides an option to view the group structure in tree mode.
In the tree view, nodes can be expanded to get to the child groups and the selected group's information is presented in the right panel.
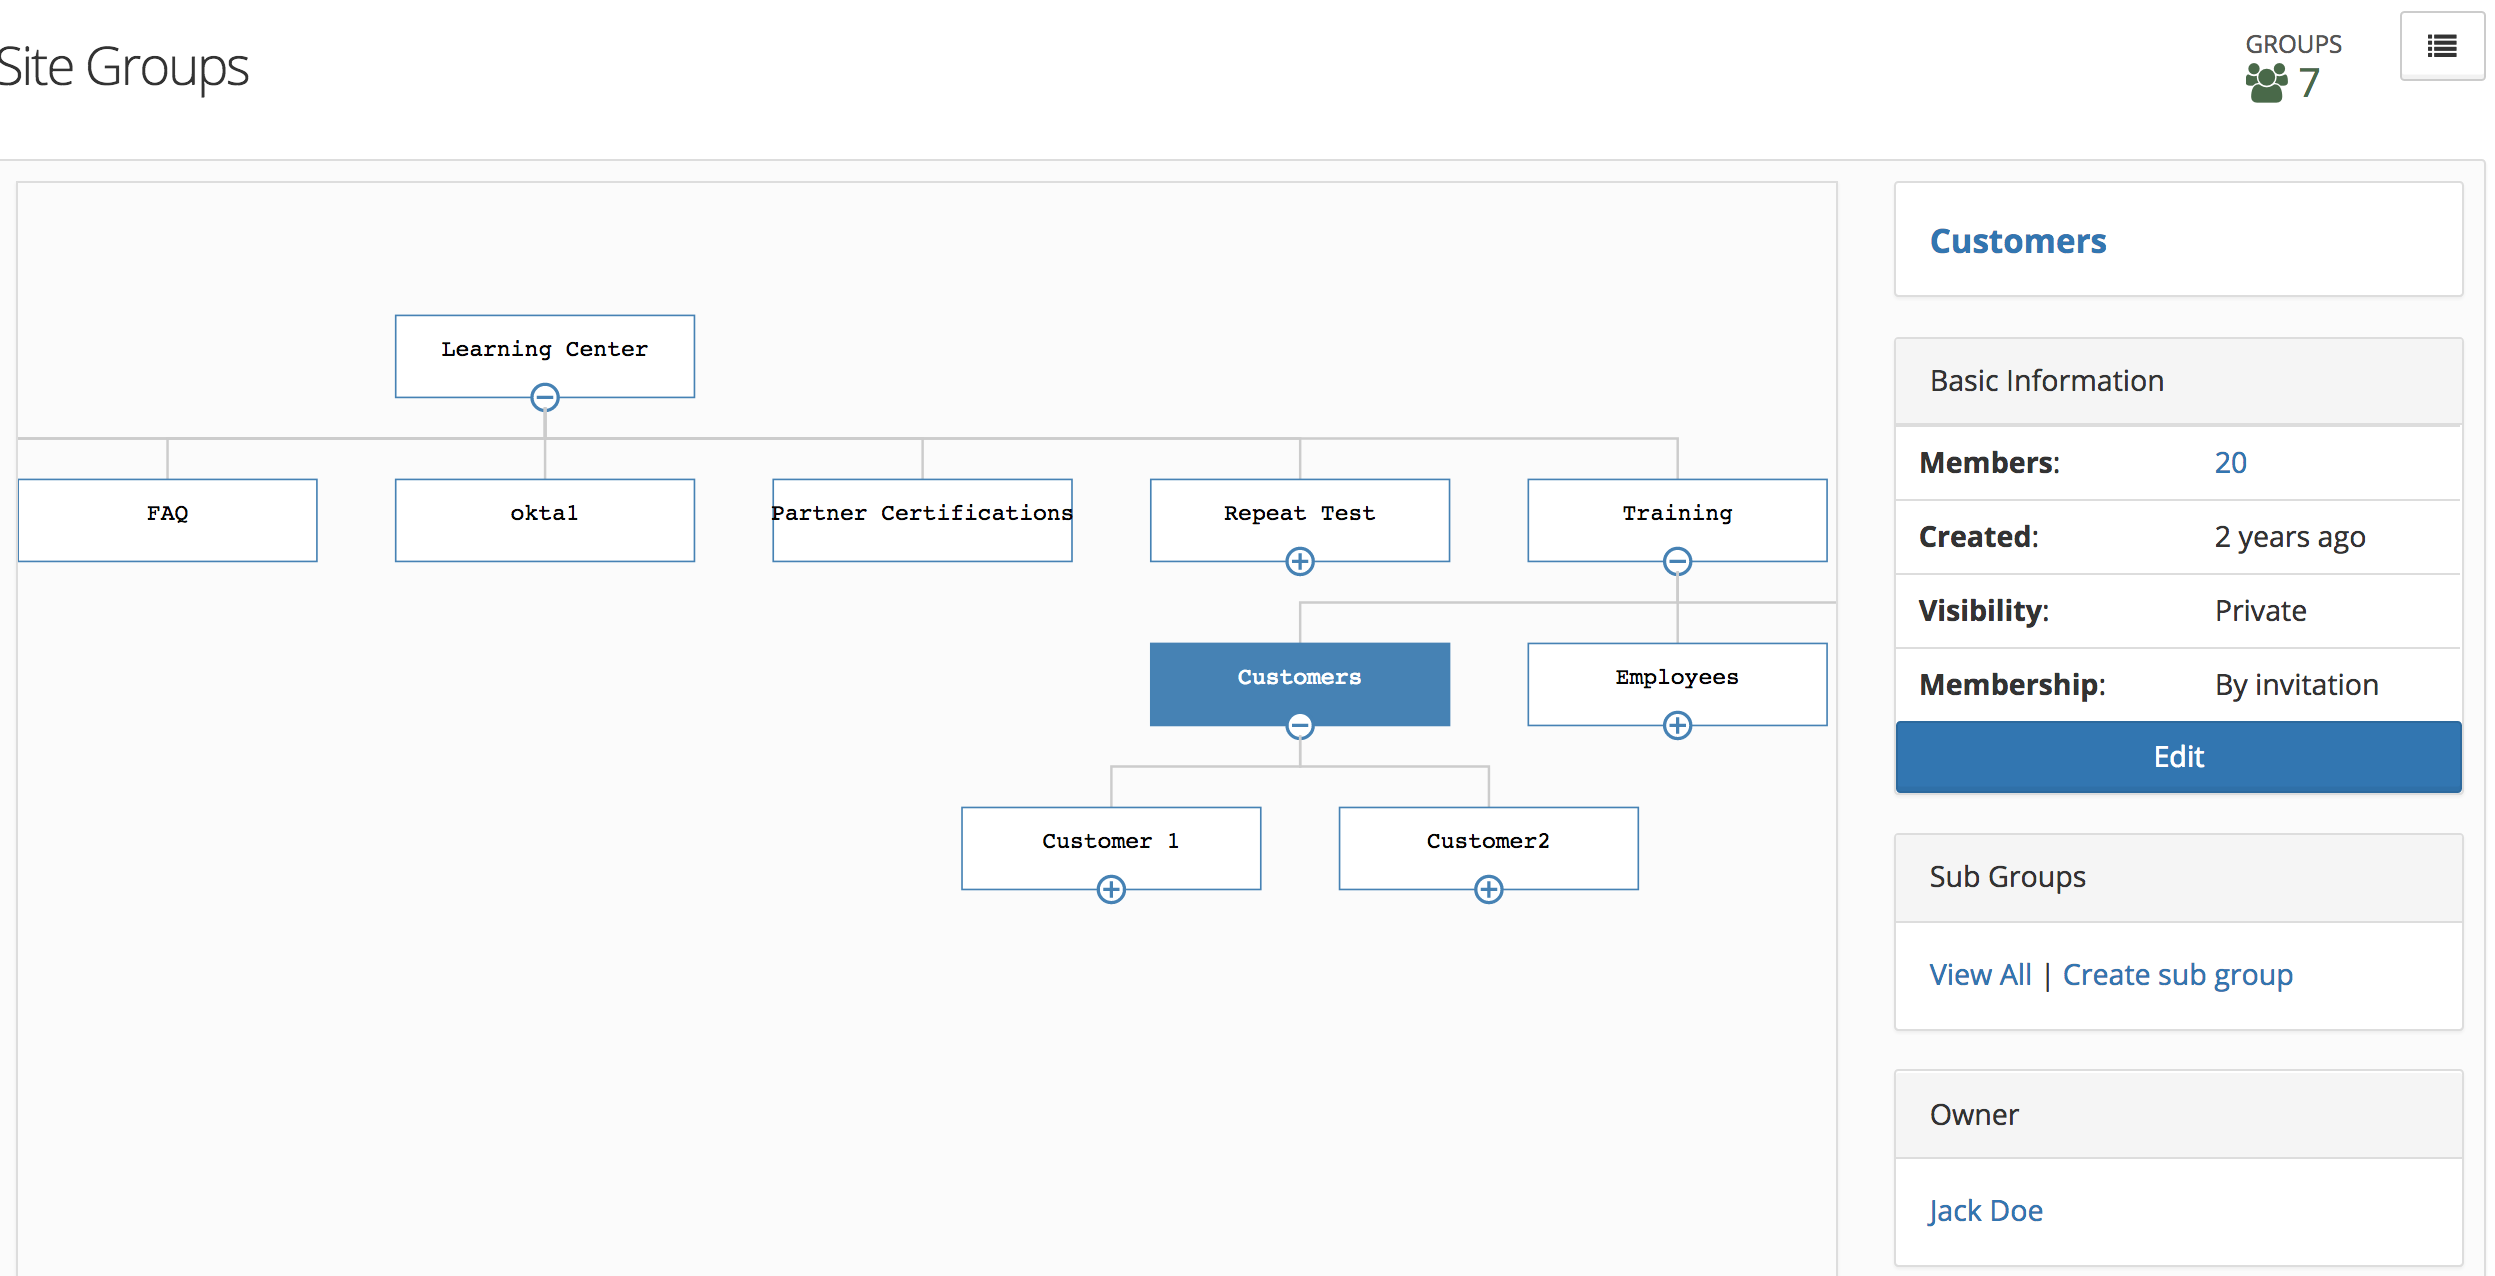
Clicking the group name link opens the group details page which also provides an option to add sub-groups.
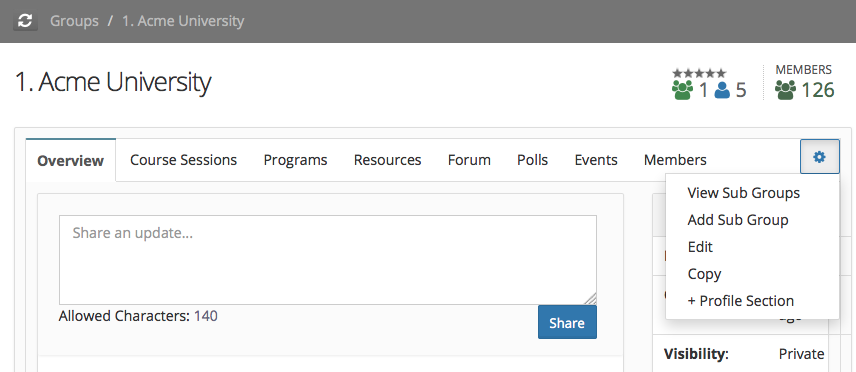
Create more groups at the next level by using the Add Sub Groups option. The picture below shows groups directly under Acme University.
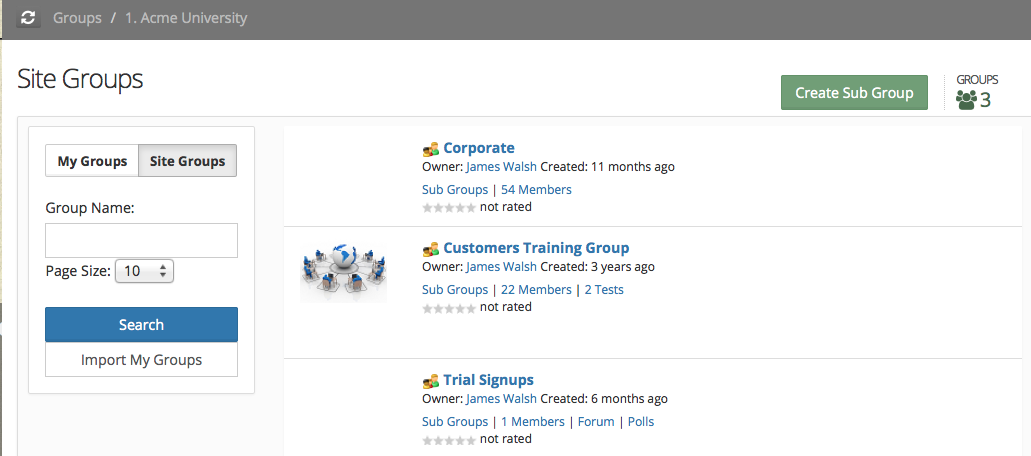
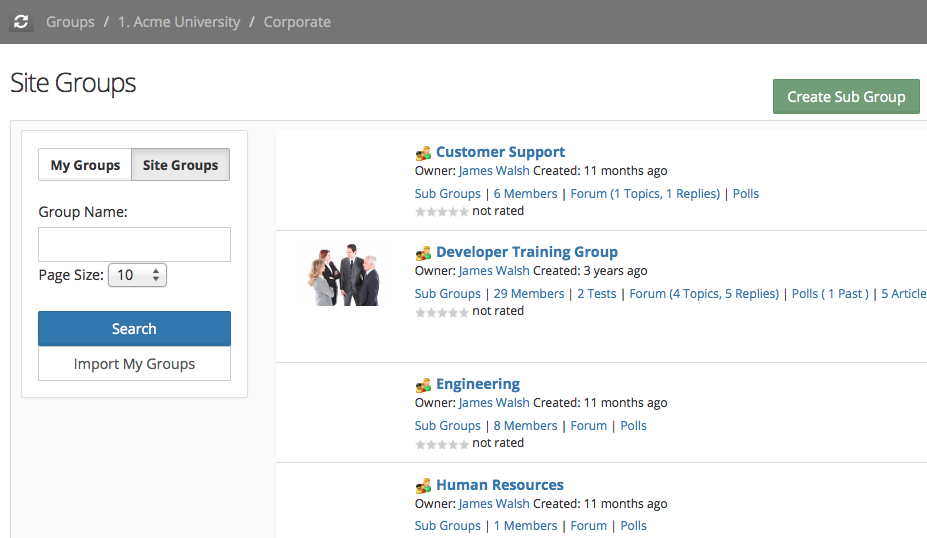
Now, drill down into the Corporate group and create further sub-groups for the teams within Corporate.
Permissions and Memberships
Once you have set up the groups like above, the system ensures the following.
- When a user is added in Active status in any group at any level, the system will add the user implicitly to the parent group (if not already found). If the parent group was not top-level the process will be repeated until the top-level group is reached. Therefore, you can see that a user would need to be added only to the most specific sub-group once, and they are automatically made a member of any other parent group going upward in the tree.
- When the user is removed from any group at any level, the system would remove the user from all subgroups under that group. If those subgroups were not the leaf nodes in the tree then the process will repeat for the next level of subgroups. Therefore user would be removed from the entire subtree.
Users can be members of multiple groups as usual. And they can also have different roles within different groups. The roles are not inherited as per the hierarchy.
You can use this mechanism to create training programs and learning resources for specific teams at the appropriate levels in the org structure. Combine the auto-enrollment option at the group level, and you can make the whole training assignment process efficient by assigning the employees to the specific groups as per their department or team.
Sub-group creation Permission
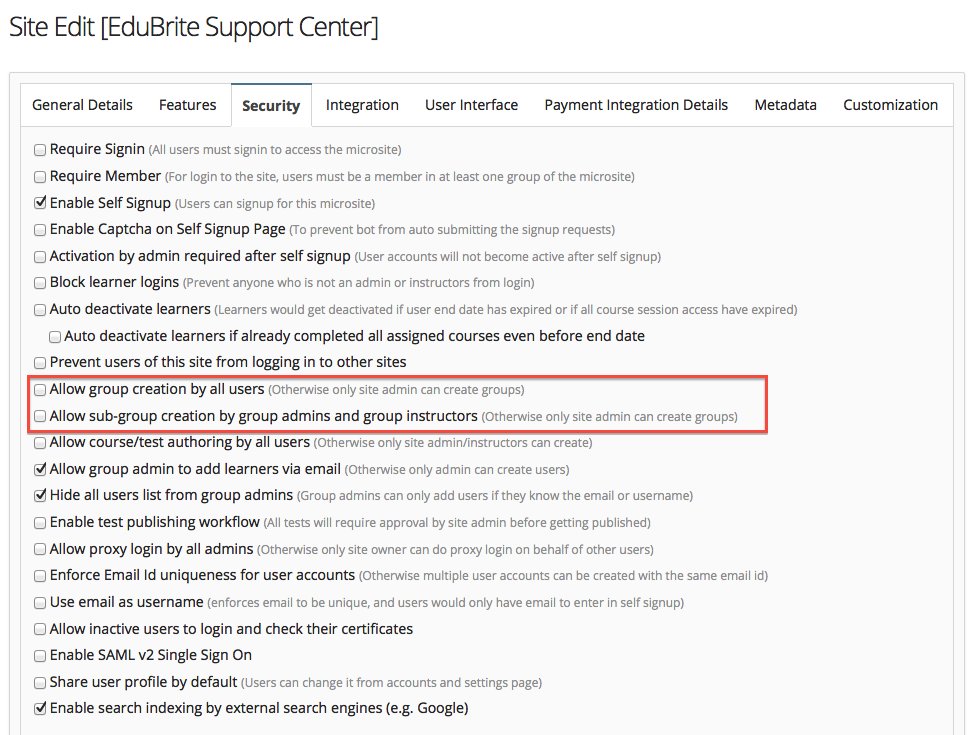
At the site level, there are two settings:
- Allow group creation by all
- Allow sub-group creation by group admins/instructors
How it works
- If both the above flags are off, then only site admins can create any group or subgroups.
- If the first checkbox is selected, then all users in the site can create groups (top-level). Any user who has the admin or instructor role in any group can create a sub-group inside it. This policy works except when you want to restrict the number of top-level groups in the site
- By keeping the first checkbox unselected and turning on the second checkbox, you can control the top-level group's creation permission (only site admins can create top-level groups). After that, anyone who is an admin or instructor in any group can create sub-groups within it
Allowing sub-group creation by learners in groups
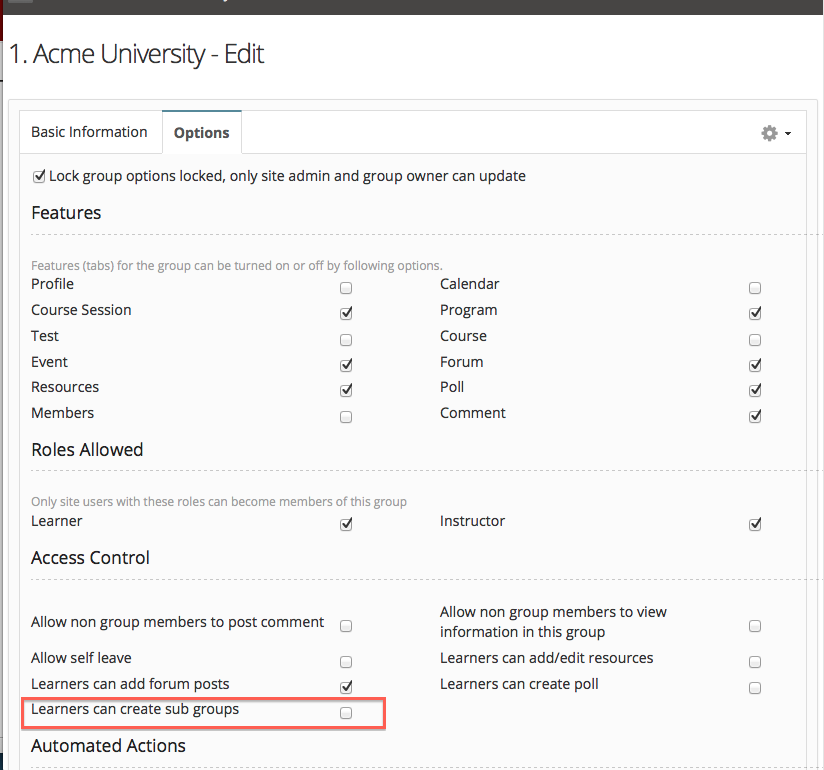
- In each group's options, a permission checkbox can be enabled to allow learners to create their own sub-groups. For this to work properly, one of the checkboxes discussed above must be enabled.

Comment