

There are two methods to update a lesson that was originally created by uploading a voiced presentation.
A. Major Change (when most slides are changed/revised in the PowerPoint)
To replace a voiced presentation file (if most of the slides are changed) in a lesson with an updated file.
1 . Upload the new PowerPoint file:
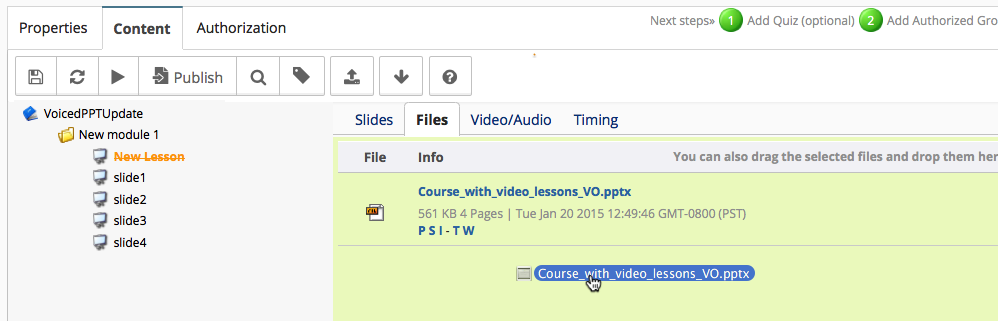
Edit the Main lesson (in which you had uploaded the PowerPoint, originally). Select the Content tab, and on the right side panel, click on the Files tab. Here you can see the originally uploaded pptx file in the files list.
Now Drag and drop the new pptx file below the existing file as shown in the files list.
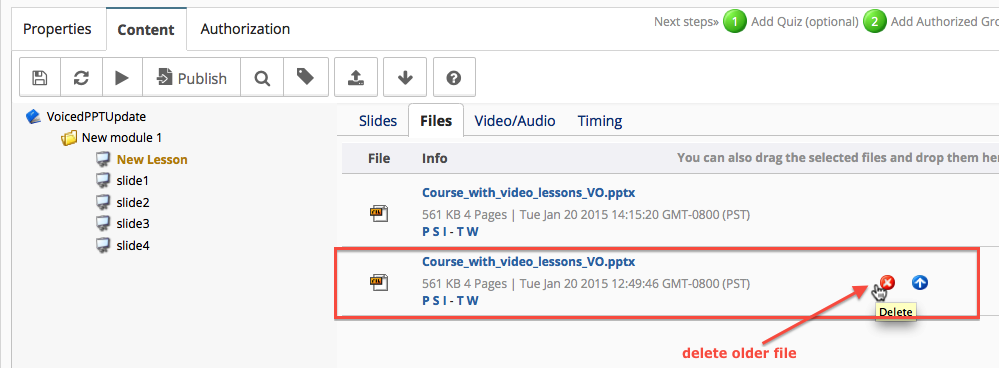
2. Once the new file has been uploaded, delete the old file.
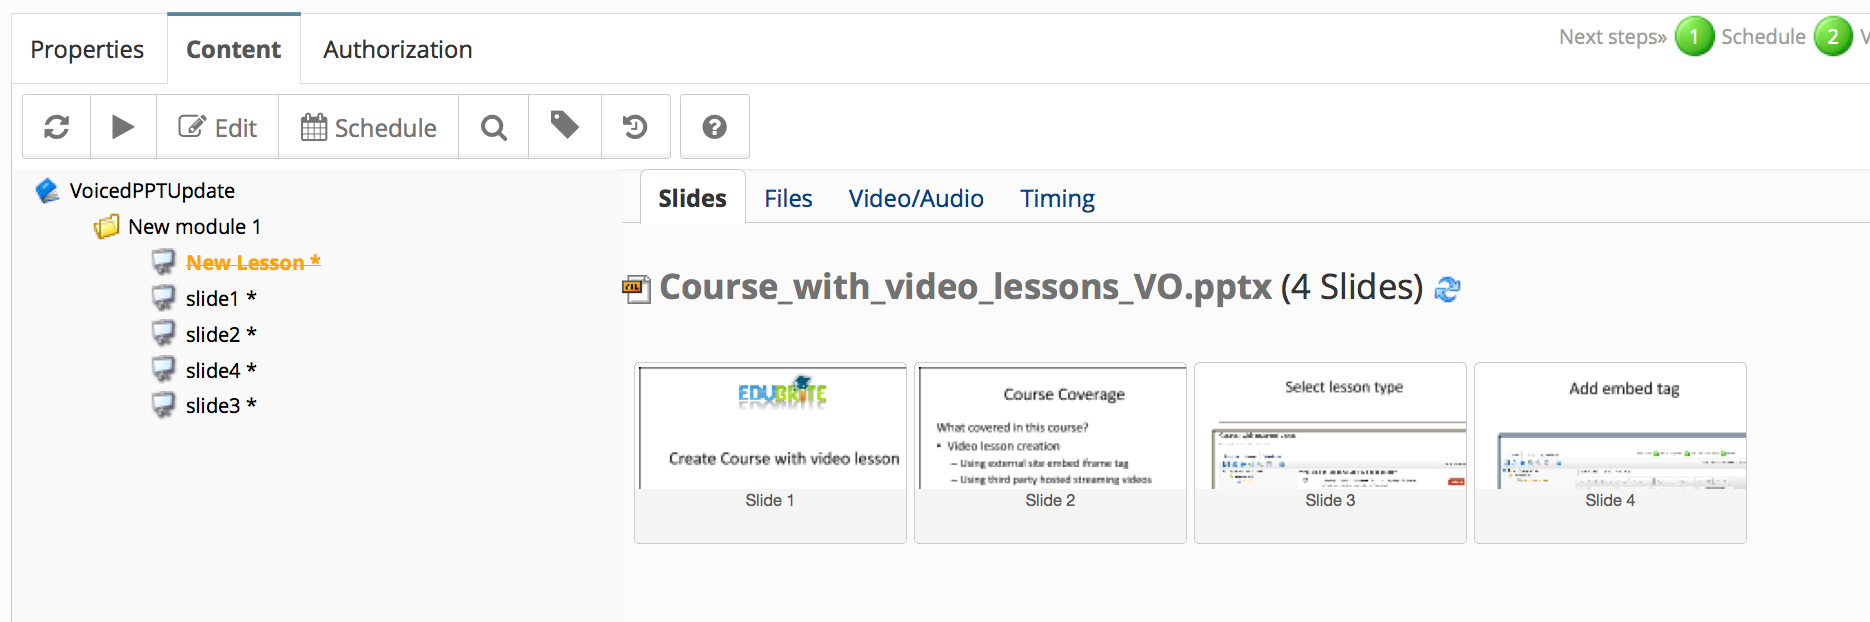
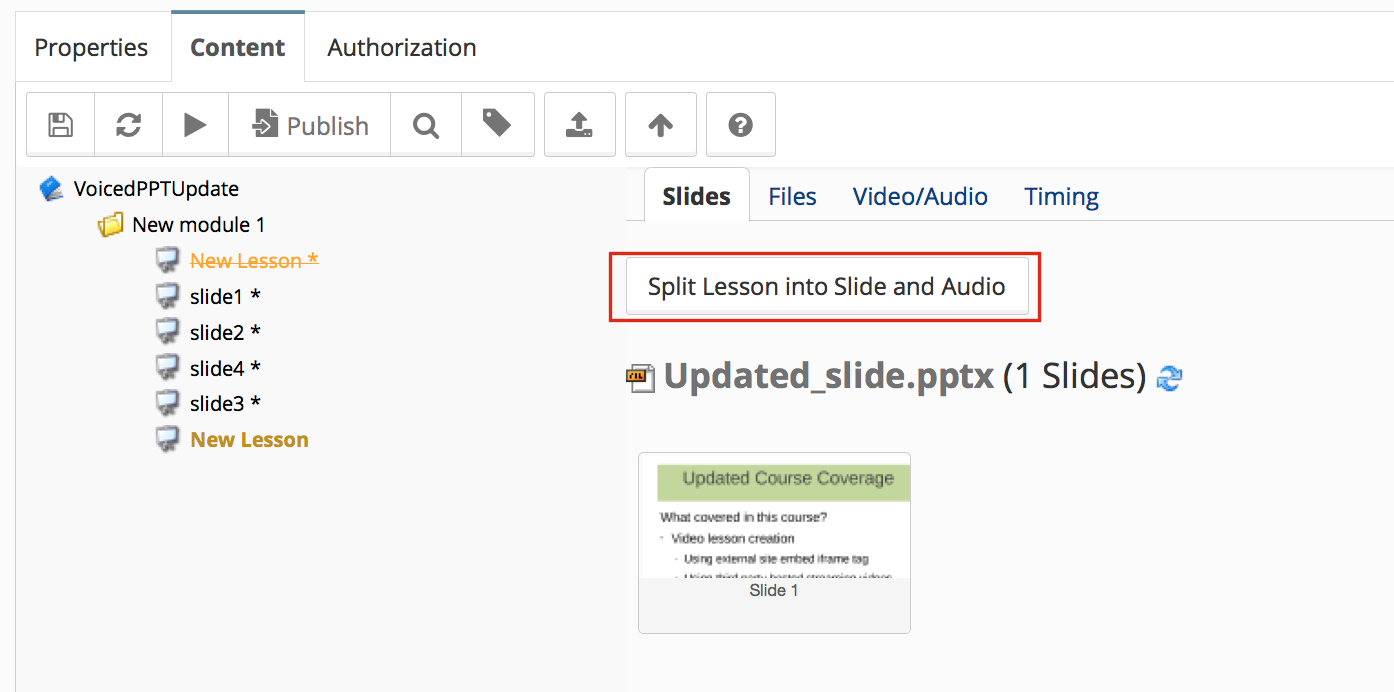
3. Split the new file into slides, as you had done originally:

If the number of slides in the old file and the new file is the same, the previous slides (lessons) will be replaced with new lessons. There will not be any additional lessons created as a result of the split.
If the number of slides in the new file is greater than the numbe of slides in the old file, new lessons will be created for the additional slides.
B. Minor change (when only a few slides have changed)
Steps (for a fresh course that a user has not yet taken):
Ex: The existing course has 4 slides and you only want to update the second slide in this course.
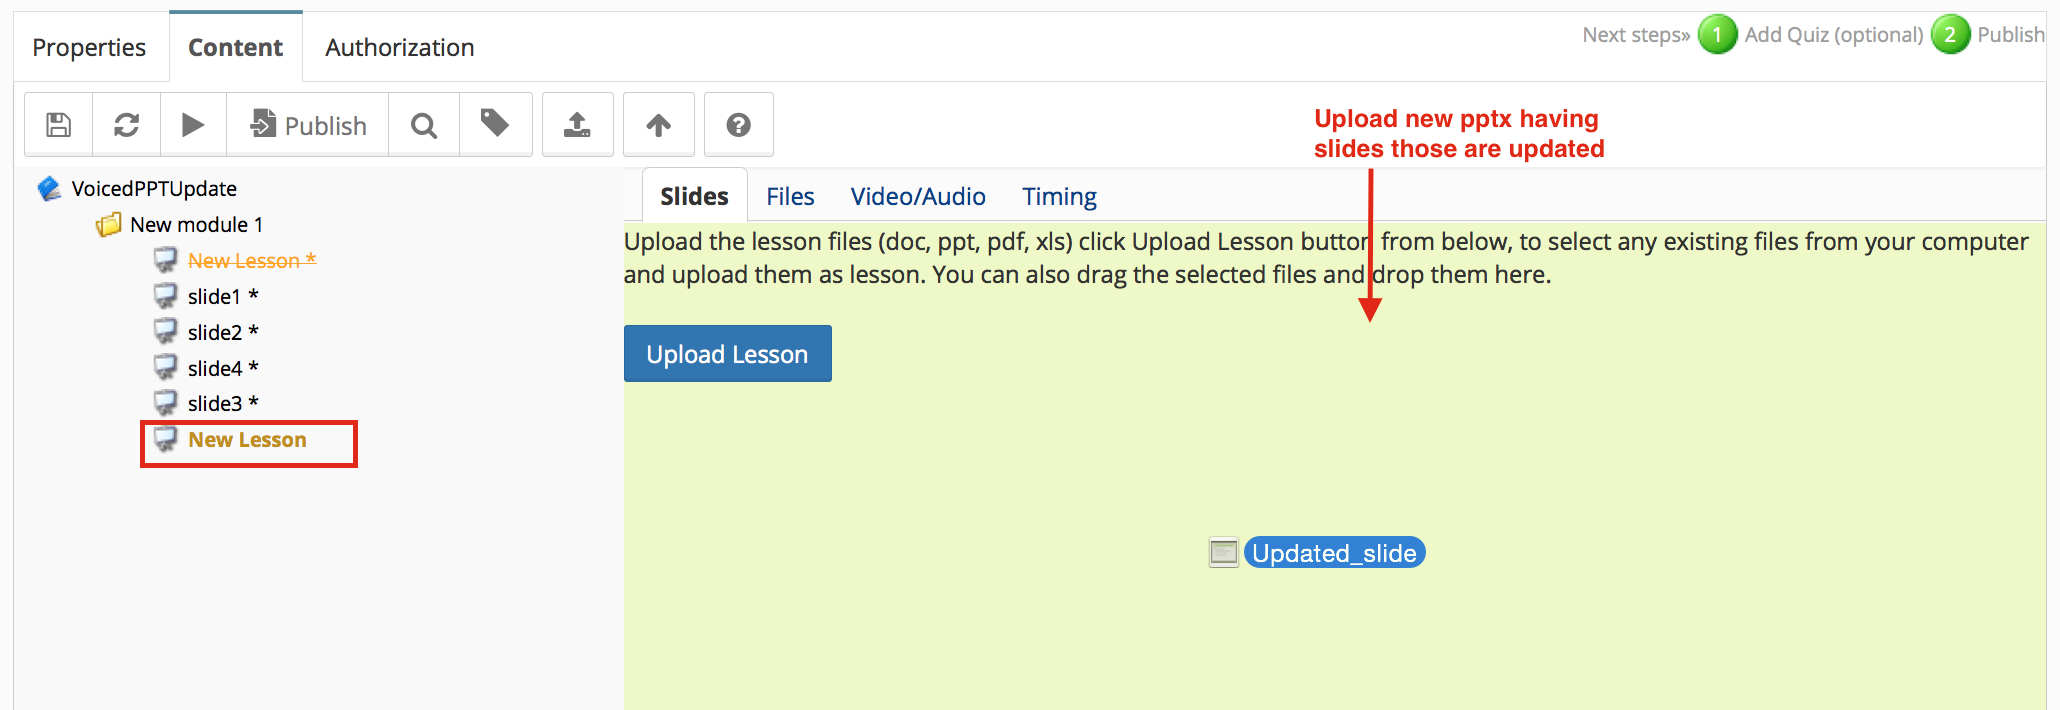
1. Create a PPTX file with only the new slide(s).. e.g. if the original lesson had 4 slides and you want to update 1 of them, create a smaller PPTX with just the changed slide.
2. Create a new lesson in the same module where the original slides reside and upload the PPTX file for it that has 1 slide.
3. Split that new lesson into slides with voice/animations; wait for the conversion to finish (smaller files will take less time for conversion).
4. Click on parts for both the original lesson as well as the newly uploaded one. This will show individual slides from both lessons in the editor.
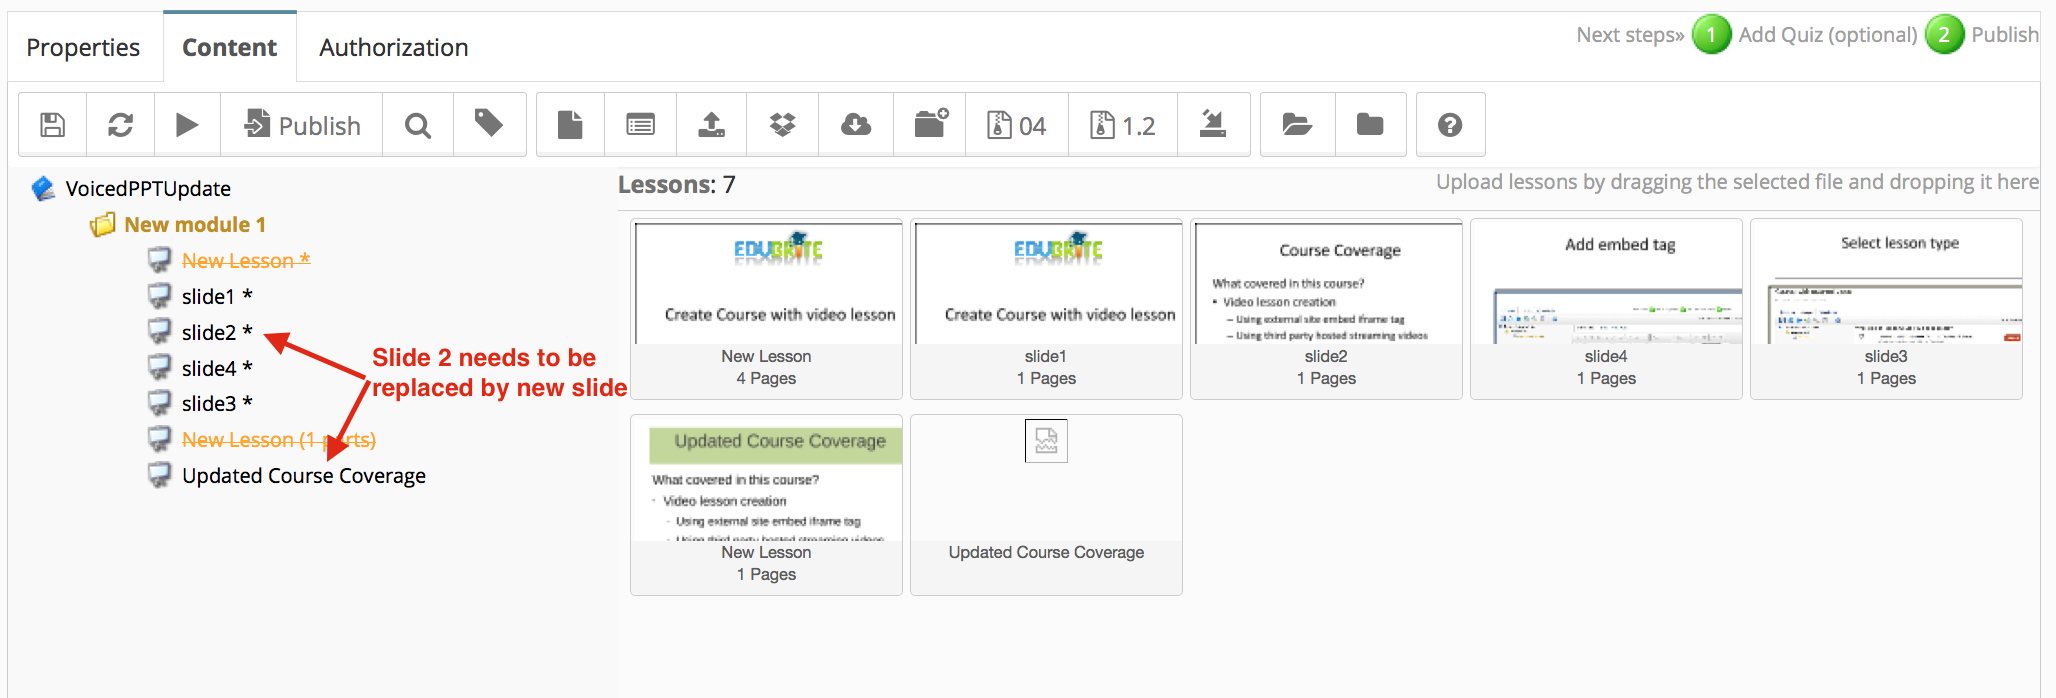
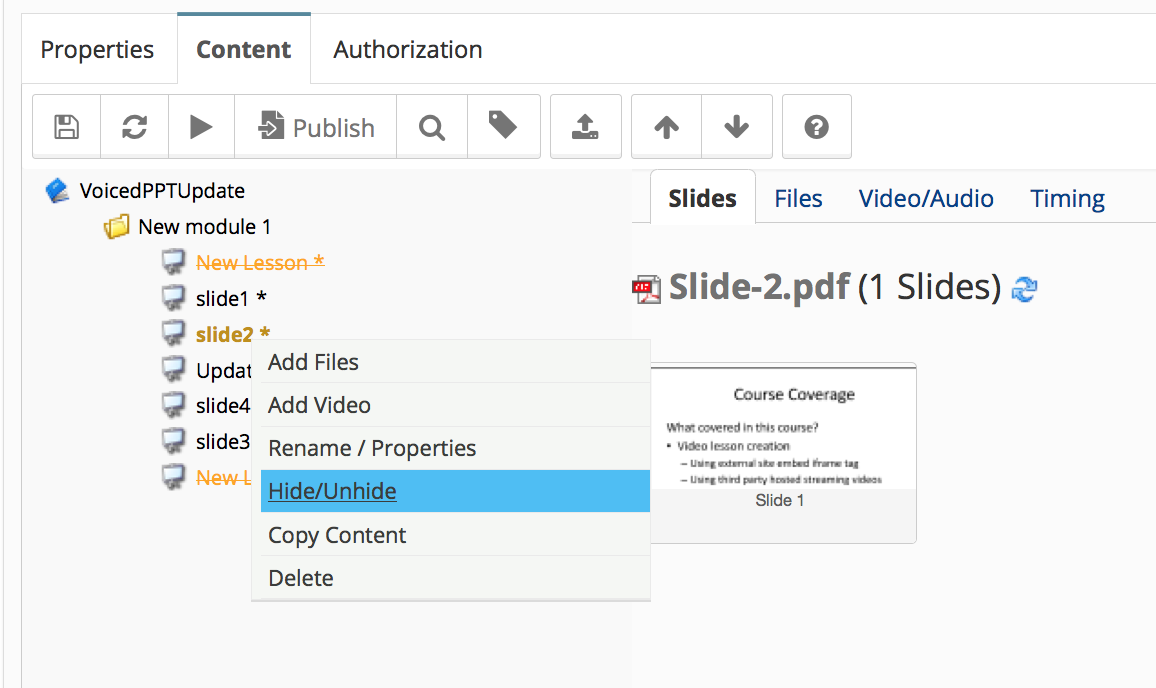
5. Then move the new slide in the position of the old slide (using arrow buttons from the content tab in the editor). One by one, right-click on the old slide and click the Hide/Unhide (toggle) option. This will strikeout the old lesson (slide).


6. Save and preview; if the course looks fine, publish it to reflect the changes in existing course sessions.
Steps (if course was already taken by users using old slides):
Follow a slightly different process here, as you would want to preserve the completion status of users who have already viewed a slide.
1 - 4 - same steps as above
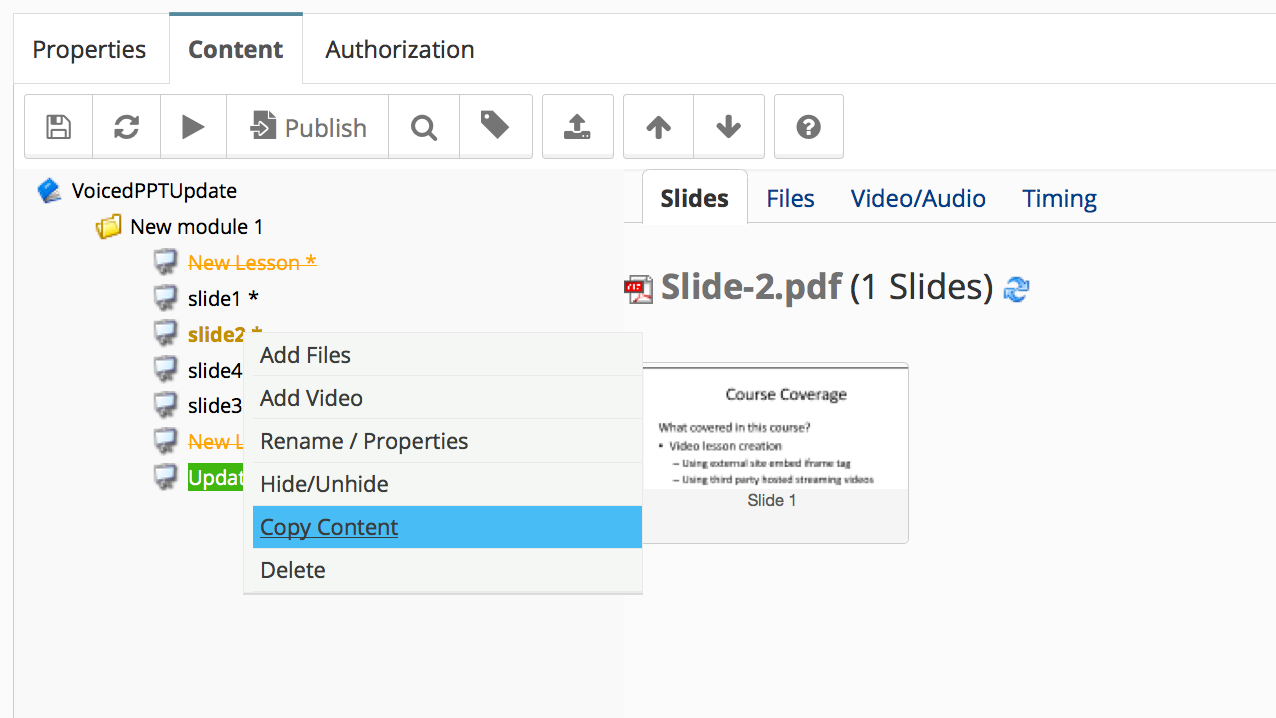
5. Copy the new slide content in the old slide -
- Click on the NEW slide while holding the SHIFT key. This will highlight that slide with a green background.
- Now right-click on the original slide that you want to replace. Select Copy Content from the contextual menu.
- This process will overwrite the content of the old slide (where you just clicked) with the slide you had selected (that is shown with green background).
- After this, you can delete the newly uploaded slide (that you already copied over to old) and the corresponding lesson.
A confirmation message appears, click OK to proceed.
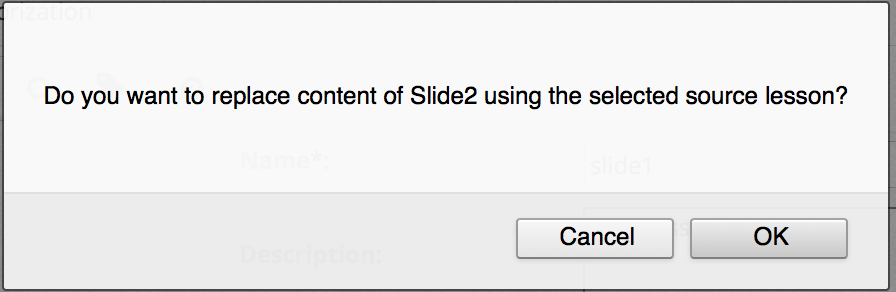
At this point you can preview the course - slide2 should show the updated content. Now you can delete the newly created lessons and its parts that were used to copy the content.
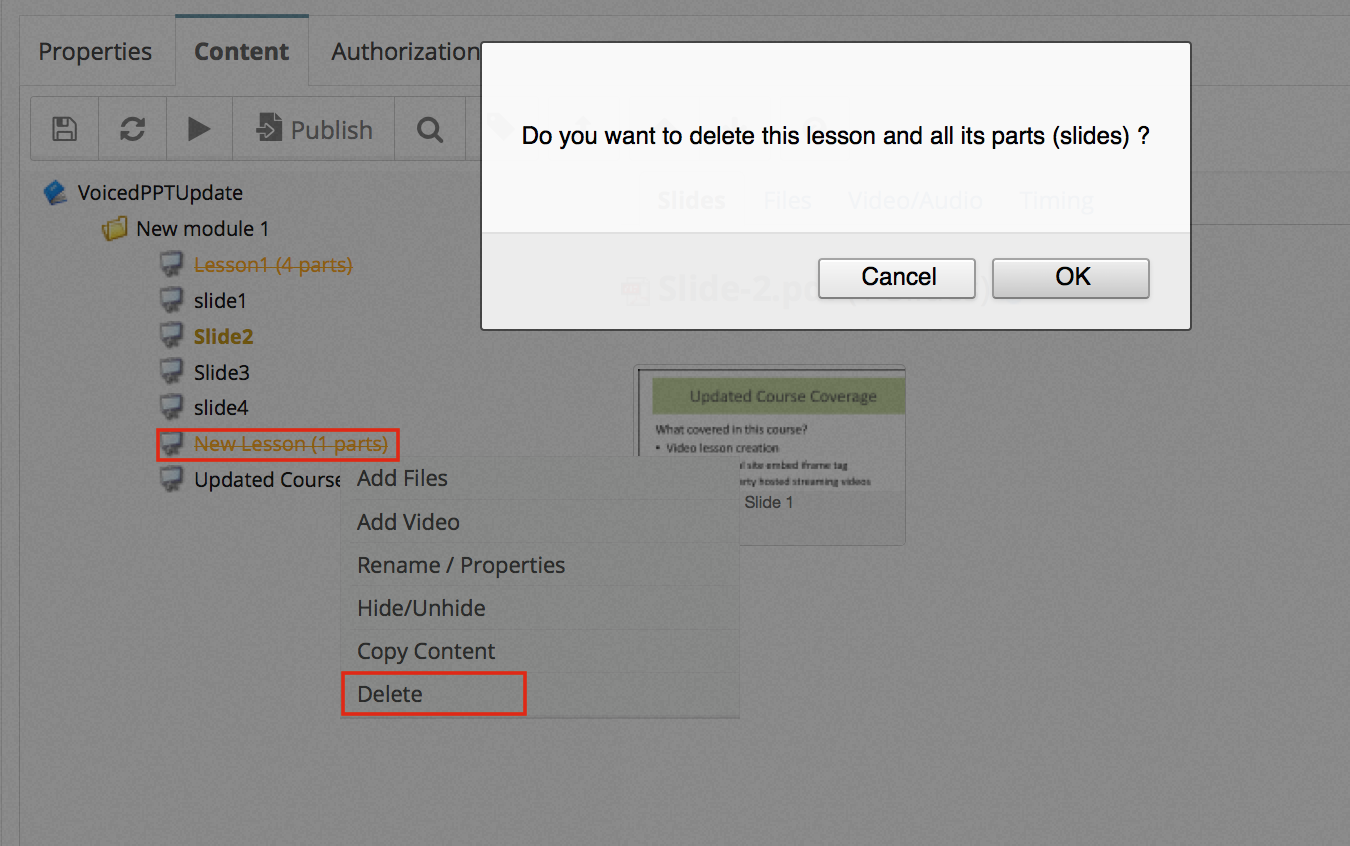
Right-click on the newly added lesson and select the Delete option. A popup appears to confirm whether you want to delete this lesson and all its parts. Click 'OK' to confirm.
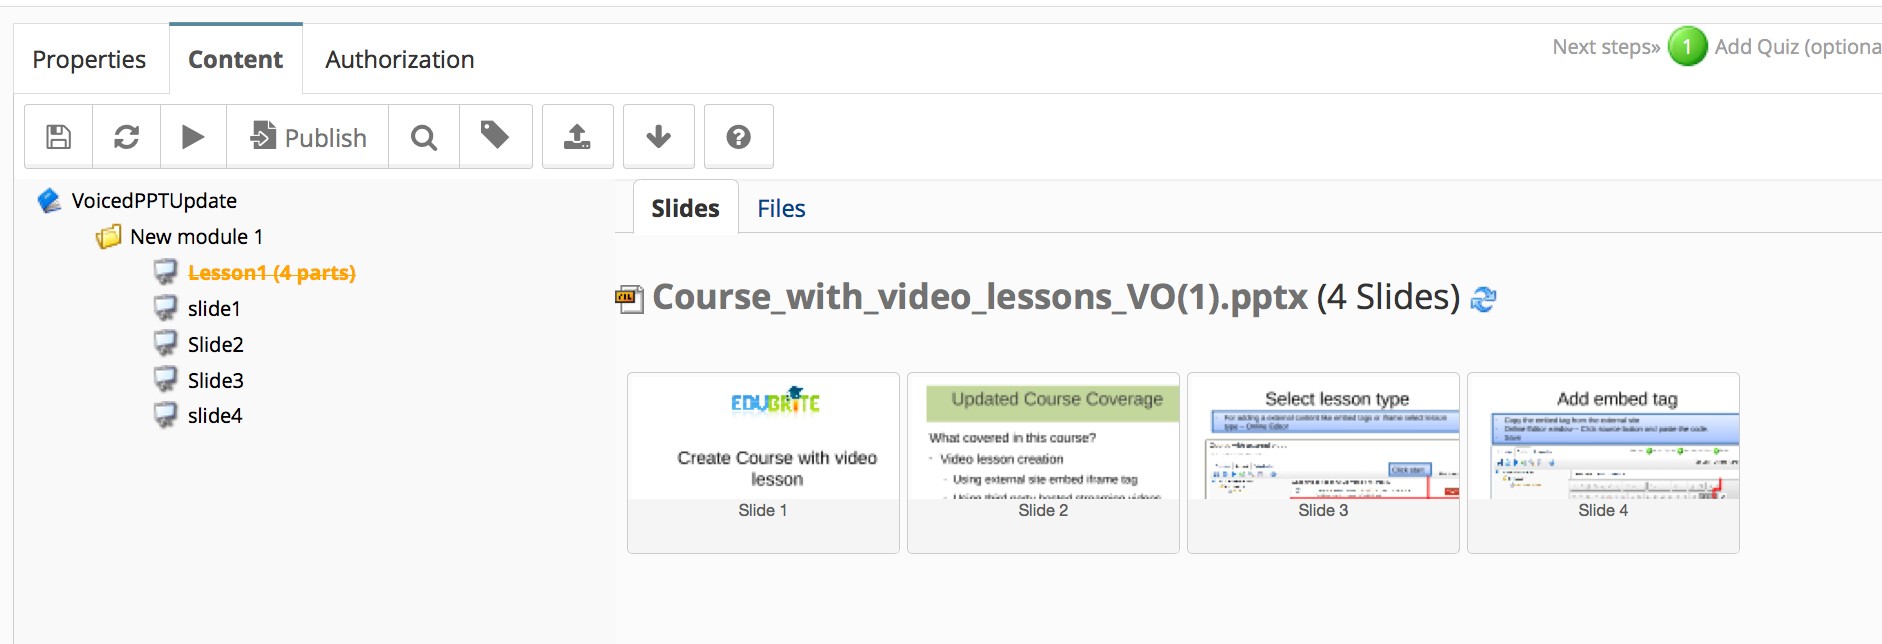
Now your course shows the four original slides but slide 2 will have updated content. You can see in the thumbnail that slide2 has updated content.
Difference between adding a new slide vs copying content to the old slide -
In the previous two methods, it's advised to use the copy content method if the course has already been used by learners, and use the move slide method for a fresh course. The main difference when you move a new slide and hide old slide means a new lesson is added and presented to the learners and this new lesson (slide) has not been viewed by users who have completed the older slide, so in a user's transcript this lesson will show as not completed. Users who are in the middle of the course and have completed the old slide as now a new slide is added and old slide is hidden learners progress will show the new slide as not completed, and if the slide's settings are 'mandatory to move to next item', the user will be forced to go back and complete this new slide before moving ahead in the course.
In the copy content method - content is copied from a new slide and placed in the old slide so there is no new lesson/slide added in the course. Users who have completed this slide will not be affected as the lesson completion status will not be impacted by a slide content change.
How To.. ?
- Replace Scorm module
- Link Scorm module acorss courses
- How to update voiced presentation file in a course
- How to manually award a course
- How to reset award_apply_grading
- How to remove user from course session for re-enrollment
- How to extend learner's course access
- Catalog list - restrict item visibility for group members only
