

Overview
In several situations, you may have a need to migrate learner's already completed (outside of EduBrite) course details to EduBrite LMS. You can do this by following instructions in this article.
Steps:
1. Enable the upload transcript feature by going to Site Admin->Site Details->Customization, and add UPLOAD_TRANSCRIPT=true in the properties list (on a new line)
2. Create the placeholder course in EduBrite (if the course doesn't already exist) and a course session for it.
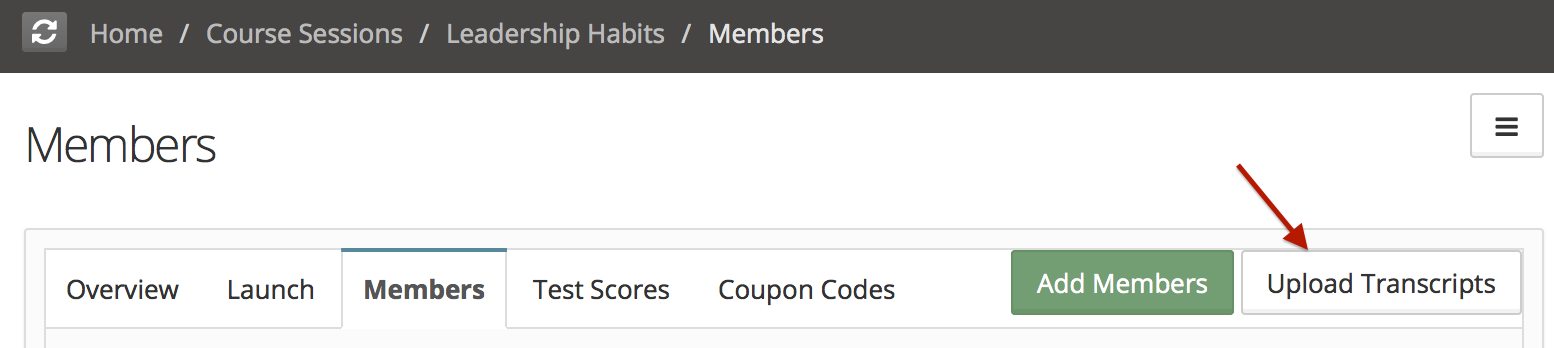
3. Open the course session->members listing page
4. Click on Upload Transcripts
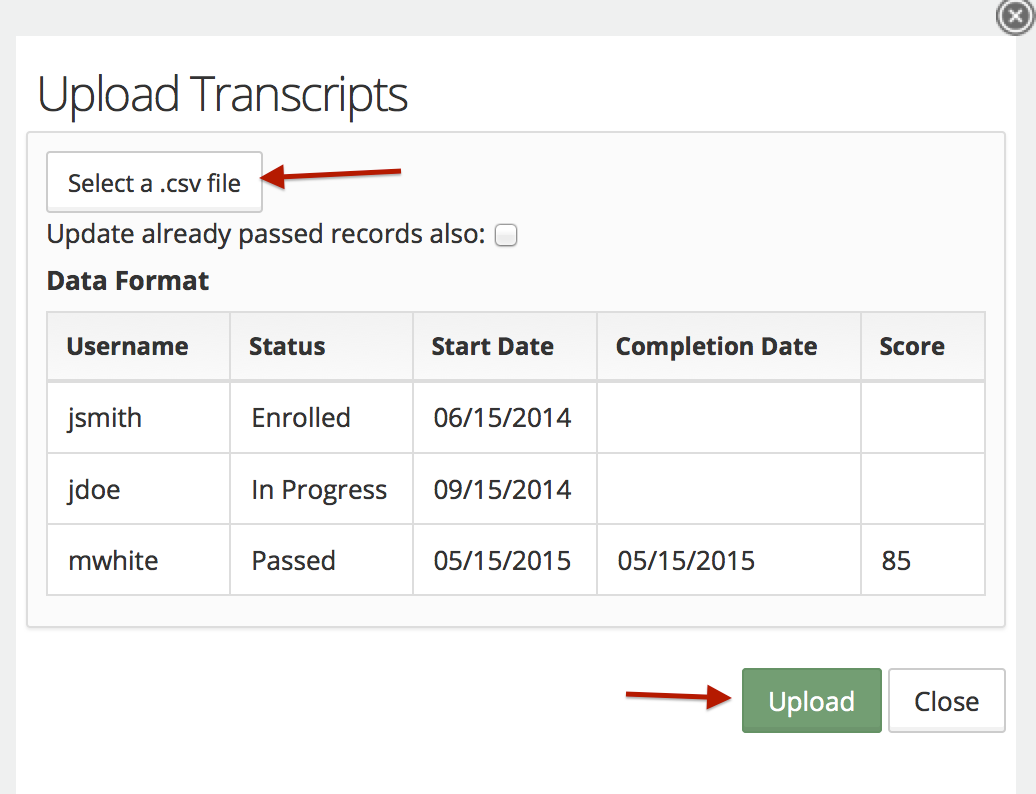
5. From the dialog, upload a CSV file in the specified format (example shown in upload dialog). By default, records with already awarded (passed) status won't be updated. In case you want to update them too, then use the checkbox option in the dialog.
Upload transcript based on other fields
To uplaod the transcript based on user's other information such as email, open id or any other custom field you have defined follow these steps.
- Create a CSV file based on format defined above
- Open the CSV file in a text editor (e.g. notepad) and insert a row at the beginning of file (as first line).
- In this new row, add # character followed by user's field name (email, openId or any custom field name).
- Save and then upload this file.
E.g. to have a transcript based on user's Emp_number (custom field), use follwing file as an example
Course Session Management
- Course Session Creation
- Course Session Configuration (Settings)
- Course Session Module level Scheduling
- Managing Learners/ Instructors
- Self Enrollment with Approval
- Online Paid Courses (Monetization)
- Course Catalog Customization
- Restricting catalog item's visibility for group members
- Coupon Code Management
- Automatic Free Access Codes
- Monitoring Trainee's progress
- Max attempts for a quiz, allowing more attempts
- Grading
- Custom Grading Scheme
- Course Completion
- Notifications
- Embed in other sites
- Attendance Tracking
- iCal Integration (Outlook, Google Calendar)
- Sub Groups
- Controlling content access based on user's group membership
ILT Integrations
- Instructor led trainings
- WebEx Integration (ILT)
- ReadyTalk Integration (ILT)
- GotoMeeting / GotoWebinar Integration (ILT)
